 EN
EN
Ever feel stuck wiring your boat’s control switch panel? This guide breaks it down for you. You’ll get the basics on the panel itself, learn what tools and parts you need, and follow clear steps for wiring it right. Plus, you’ll see how to test your setup and keep it in top shape. Get ready to fix wiring headaches and get your boat running smoother.
The Basics of a Control Switch Panel
You know the drill. A control switch panel is a piece of equipment combining a panel control switch, button, and breaker. On your boat, you’ll find different panel switches, and setting the wiring parameter right means safe operation every time.
What is a Control Switch Panel
You need a solid starting point, and the control switch panel kicks things off. This unit merges a power switch, a button, and a breaker in one neat setup built like the switch pro sp 9100, featuring sturdy cable links, a bright light for quick checks, a gigabit ethernet port for smooth data flow, and even a cart design for easy mobility:
Use this panel to tighten up your boat’s electrical system and keep things in order. It cuts out the guesswork during wiring and gives you a clear plan for installation, so every connection—cable or light—does its job without fuss. With everything set in one unit, you enjoy a smoother setup on your boat and less time worrying over loose links.
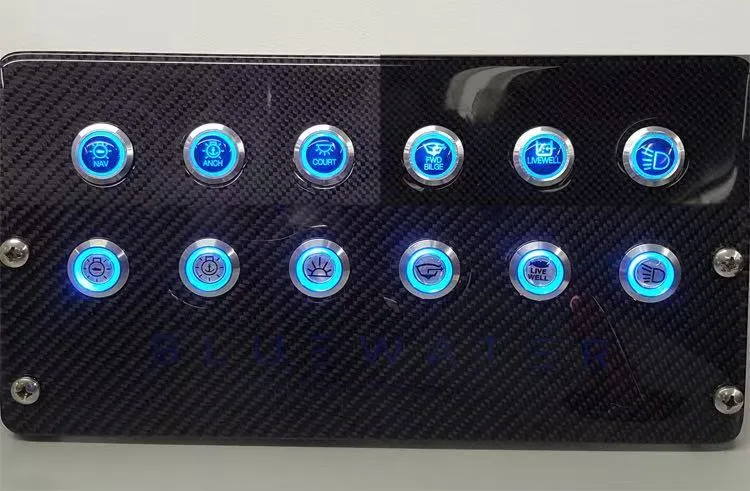
Key Components of a Push Button Switch Panel
Check out your push button switch panel and see the magic happen. You rely on solid patch cables for connections, sturdy cables for power, clear optics for quick status checks, and an interlock switch for generator that keeps things safe—smart management ties it all together:
- Reliable patch cables for strong signals
- Durable cables for secure wiring
- Bright optics for clear feedback
- Interlock switch for generator to protect operations
- Smooth management to maintain order
You know what matters: having these parts working right makes wiring your control switch panel for your boat a whole lot easier. With each component in place, you can set up your panel quickly and keep your boat running like a well-oiled machine.
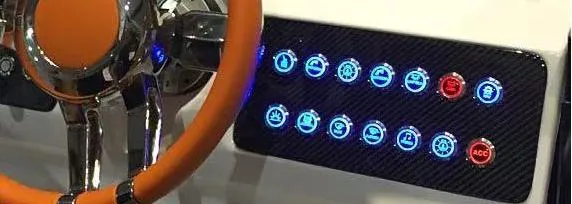
Types of Panel Switches Used in Boats
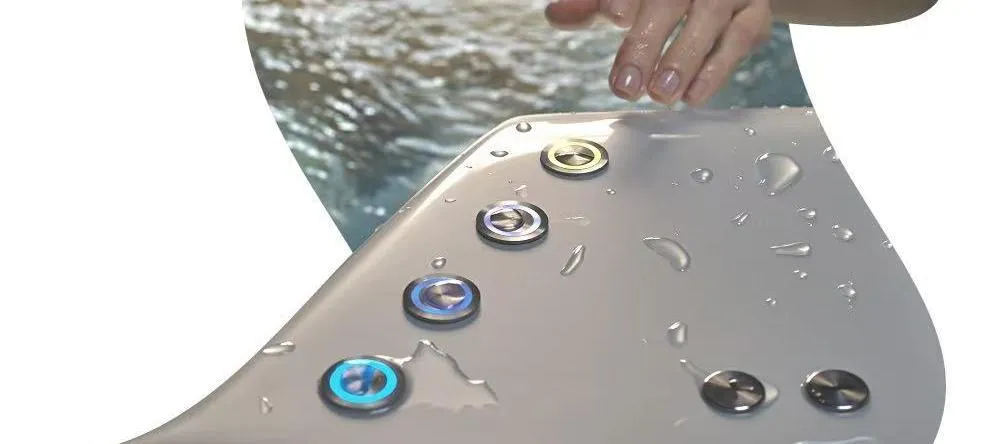
You might be wondering which panel switches make the cut for your boat. Some options come in a tough steel casing and others show off a slick touch panel light switch that’s simple to use. You face choices in units that handle cable management and routing:
- Robust steel design built for durability
- Touch panel light switch for easy operation
- Efficient cable management to keep wiring neat
- Smart routing to simplify your setup
- Reliable units tailored to your needs
Once you check out these options, you’ll know what fits your boat best. Picking the right switch not only makes wiring easier but keeps your operations running smooth on the water.
Importance of Proper Wiring for Safe Operation
Wiring is the unsung hero of your boat. Every link—from your fuel feed to the wheel controls, your computer signals, and even your network switch—needs to click perfectly with your marine electrical panel to keep things running smooth and safe:
- Check that cable bonds hold tight to your fuel system
- Make sure connections secure power to your computer controls
- Verify that links keep your network switch humming along
- Confirm that wiring reinforces smooth wheel operations
Inspect every cable with a sharp eye, knowing loose wires lead straight to headaches. A tight setup means your marine electrical panel runs like a charm, letting you take charge without unwelcome surprises.
Tools and Materials Required for Wiring
You need the right gear before wiring your switch control panel. Borrow the right hand tools, grab marine wires in correct sizes, and suit up with safety gear. This guide shows you where quality supplies come from, keeping your panel switch design slick—almost as clear as a call on your telephone or a glance at a mobile app.
Essential Tools for Electrical Work on Boats
Having the right tools makes wiring your boat a lot less of a headache. When you work with control panel switches, you need gear that handles data flow, supports internet access, smooths out troubleshooting, and keeps your network steady:
- Reliable multimeter for circuit checks
- Wire strippers for clean cuts
- Screwdrivers for firm installs
- Insulated pliers for secure grips
- Electrical tape to lock connections
You see, each tool in your kit cuts down on hassle and makes every connection count. With these items in hand, you avoid long troubleshooting sessions and keep your boat’s network and controls working without a hitch.
Recommended Wire Types and Sizes for Marine Use
You need marine-grade wires rated for alternating current to keep your control switch panel running smooth. These cables provide a solid interface with your setup and often come with a backlight to help you spot issues fast.
Set the right wire sizes that keep connections neat and safe. Matching gauges works well with your control room’s interior design and supports a stable vlan network across your system.
Safety Gear to Use During Installation
Grab your safety gear first—you deserve top-notch protection when working with electrical wiring on your boat. Slip on your insulated gloves and goggles before you start to solder any joints, and keep your touchscreen multimeter handy to check volt readings and catch any odd sparks early.
When you dive into the installation process, every bit of electrical work demands extra care and solid safety gear. You use your trusty touchscreen to monitor volt levels as you handle solder and secure wiring connections, ensuring that every electrical bit stays on track without risking your safety.
Where to Source Quality Materials
Shop for quality items for your boat control panel wiring like you’re picking the right parts for a DIY project. You check online stores and local vendors, making sure every power supply, panel-switches, and panel disconnect switch comes with clear manufacturing details and solid information:
- Local electrical supply shops that test their gear
- Online catalogs from trusted manufacturers
- Wholesale distributors with detailed product information
Pull together your supplies without fuss, knowing smart decisions now save you headaches later. Solid research and upfront information make your wiring job a smooth ride.
Preparing the Control Switch Panel for Wiring
Pick a spot that keeps your panel clear of clutter and heat. Plan your circuit layout as if setting up a smart home, where electricity and broadband flow with ease. Label every button so you know what’s what. Make sure you leave enough room for quick access, just like you’d expect for a sturdy generator sub panel.
Choosing the Right Location for Installation
Pick a quiet spot on your boat that stays cool and free of clutter. This space should work like a mini data center where automation runs smooth, a patch cable ties things together, and an ios display helps you keep an eye on everything.
Steer clear of busy areas that could mess up your work. Instead, choose a calm corner where even a nearby printer can print labels to keep your wiring setup neat.
Planning Your Circuit Layout
You want your circuit to work, so take a minute to sketch a simple menu of connections. Mark each patch point and note where a resistor should go so that your wiring neatly ties into the steering wheel controls. This plan helps you spot a decent sale price on parts and keeps each connection clear and smart.
Before you start wiring, double-check your plan and revisit the menu to make sure nothing’s missing. Test each patch location as you add your resistor placements to see if everything links up with the steering wheel control. Keeping your layout solid means you can grab quality parts at a good sale price and get your boat running as it should.
Labeling Switches for Easy Identification
Label your switches so you can keep tabs on which wire goes where, making setup on your boat a breeze. A clear label lets you manage your fiber patch panels and lighting without fuss, so every connection is right where you expect it.
Back up your labeling scheme on github to match your physical switches to your digital plan, and your server log confirms every link is in place. With this solid system, you dodge mix-ups and keep your wiring neat, saving you time and stress on the water.
Ensuring Proper Access to the Panel
Pick a spot that is clear and built for easy access. When wiring your control switch panel, make sure every actuator is in line, your machine is set to perform, and your internet and telecommunications ports are free to work:
Double-check that nothing gets in your way and that all paths remain open for quick fixes. This clear access keeps your wiring neat and lets you handle every machine tweak without missing a beat.
Step-by-Step Instructions for Wiring a Control Switch Panel
You’re ready to wire your control switch panel like a pro. First, connect your power with the right setup. Next, wire each switch correctly—be it a switch or panel mount switch like the switch pros 9100—while adding fuses, breakers, and secure ground connections to keep your signal clean. Skip to content and follow these simple steps.
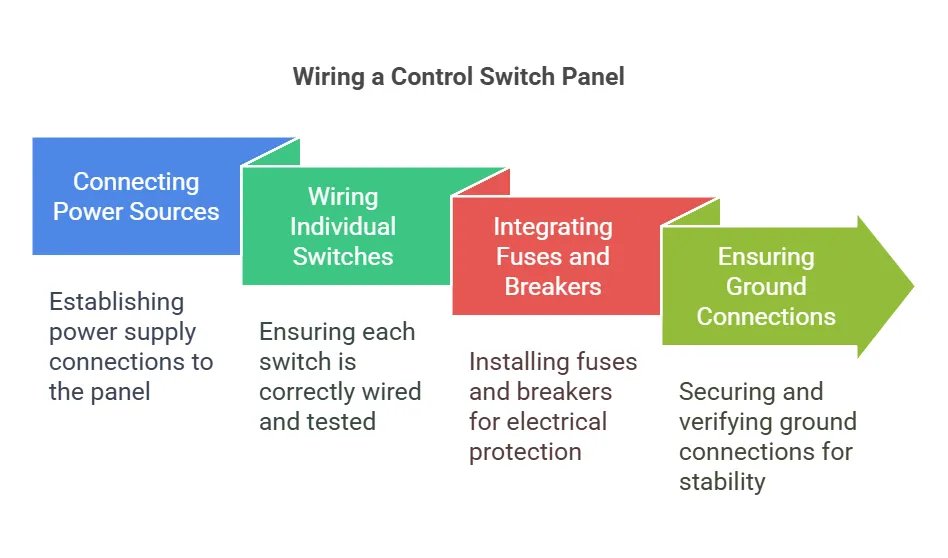
Connecting Power Sources to the Panel
Start by connecting your power supply to your panel, treating it like setting up your kitchen—each wire has its place, and nothing gets left behind. You secure every link in your control system so your electronics run smooth and stay sturdy against stray electromagnetic interference.
Lay out the wiring in a clear networking pattern that lets your boat’s systems chat without a hitch. With every connection tight and precise, your power flows exactly where you need it, keeping your set-up simple and dependable for everyday rides.
Wiring Individual Switches Correctly
Wire each switch with care, making sure every sensor line and fiber link finds its rightful spot on your push button switch panel. This tight setup keeps your switch gear panel in top shape on your boat, so nothing goes awry when it’s time to hit the water.
Test each switch as you install it, watching for any loose ends that could cause trouble later. A clean, proper wiring job means your boat runs smoothly, with every sensor and fiber connection working just right on your switch gear panel.
Integrating Fuses and Breakers for Protection
Install fuses and breakers in your control switch panel to lock down the electric current and stop any sudden surges. This step helps enable consistent power over ethernet, ensuring that your system delivers steady power every time.
Each component catches stray electric spikes before they disturb your wiring setup. With these safeguards in place, you keep the electric flow reliable and ensure your panel stands up to any unexpected changes in power.
Ensuring Ground Connections Are Secure
Make sure your ground connections stay rock solid because even a loose wire can put you in a tight spot. You rely on a trusted electrician to check that your transformer is secure, your light switch is set right, and your inventory has the parts you need:
- Ask your electrician to examine every ground connection.
- Confirm the transformer is firmly attached to its grounding point.
- Test each light switch for a reliable hold.
- Ensure cables are set as solidly as a truck parked on concrete.
- Keep your inventory stocked with quality components.
Review each connection one last time to catch any slips. This method makes your wiring job smooth so your boat runs without a hitch.
Testing Your Control Switch Panel
Test each switch with a multimeter on your patch panel and touch screen light switch. Check every contact and run a relay function test, like you’d do on a vehicle, to catch wiring quirks and meet marine electrical standards. You get clear steps for troubleshooting and ensuring every part works as it should.
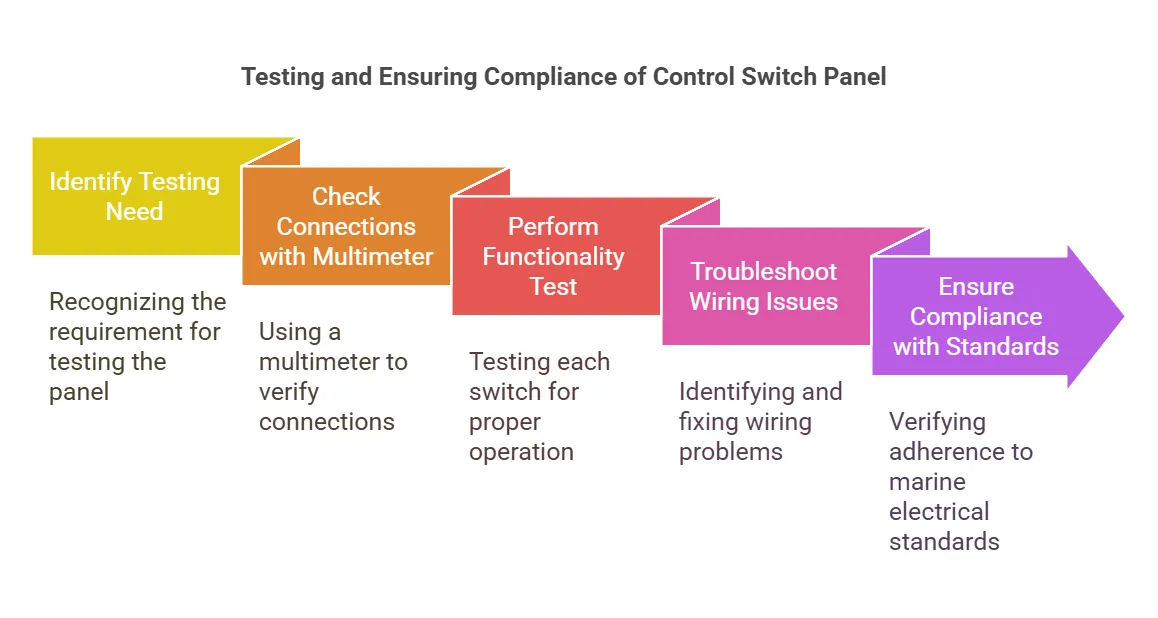
Checking Connections With a Multimeter
Grab your multimeter and start checking every connection in your panel. Test the voltage on your transfer switch and dimmer circuits, and keep an eye on the wiring running from your cockpit to the ethernet setup near the wall.
Review the readings to catch any erratic drops or flickers right away. If something doesn’t add up, fix it immediately so your transfer switch, dimmer, and all cockpit and ethernet links by the wall stay solid and reliable.
Performing a Functionality Test for Each Switch
Kick off your switch test by powering each one and checking for that crisp snap. You inspect the circuit breakers, fiber optic links, network infrastructure, and even the plastic housings to be sure everything clicks into place:
Simulate real use by toggling each switch under load, watching closely for any lag or flub with the breakers. If anything feels off, you know it’s time to tighten your setup so your panel stays rock-solid on every trip out.
Troubleshooting Common Wiring Issues
You might find that your wiring setup throws a curve when the voltage drops or a fuse gives out unexpectedly. When your switchpros system acts up, check each stainless steel connector and your wiring infrastructure for loose links:
- Test the voltage at each connection point.
- Inspect your switchpros unit for any signs of wear.
- Replace a suspect fuse without delay.
- Examine stainless steel fittings for secure attachment.
- Review the overall wiring infrastructure for any missing links.
Once you run these checks, reassemble and test each connection to ensure smooth performance. Your methodical approach now backs you with a system that stays solid every time you hit the water.
Ensuring Compliance With Marine Electrical Standards
Check your control switch panel like you’re debugging a piece of javascript—ensuring every wire, usb connection, and auxbeam 8 gang detail hits the mark under marine electrical standards. Every step you take gives your customer confidence, knowing your setup is safe and square on deck.
Use a steady hand and a trusty multimeter to verify that each element meets strict marine guidelines without cutting corners. This thoughtful approach means your usb links and auxbeam 8 gang components work flawlessly, giving your customer peace of mind every time you fire up the panel.
Maintenance and Best Practices for Control Switch Panels
Keep your control switch panel in top shape by checking it often. Clean it well, tweak switches when needed, and label every wire so you know what’s what. These tips help your setup last long and work smoothly on your boat. Stick with these practices, and your wiring stays reliable every time you set sail.
Regular Inspection Tips for Longevity
Check your control switch panel regularly to catch any issues early. You inspect each part of the wiring—from cables to switches to ground connections—and stick to a simple log of what you see:
After your review, you fix any loose links on the spot and note the changes in your log. This steady routine keeps your marine wiring in top shape and your boat running smooth without any last-minute surprises.
Cleaning and Protecting the Switch Panel
Clean your control switch panel with a soft cloth and a safe, gentle cleaner. Keeping it spotless helps your buttons work right and stops small wiring issues from spreading into big troubles on your boat.
Protect your panel with a sturdy cover that blocks salt spray and water splashes. This smart step keeps your wiring solid and your setup ready for every ride on the open water.
Upgrading or Modifying Switches Over Time
You might notice your control switch panel feeling a bit tired after plenty of use. Upgrading or modifying your switches keeps your boat wiring in tip-top shape and saves you time when issues pop up.
Take some time to check your connections and swap in newer components if needed. Updating your panel not only makes repairs easier later but also keeps your marine setup dependable every time you hit the water.
Importance of Documenting Wiring Layouts
Keep a simple wiring record every time you set up your control switch panel. Documenting wiring layouts means you have an easy reference when a cable or connection needs checking, so you never have to guess which part goes where.
A written wiring plan lets you clear up any confusion during repairs or upgrades. With your layout notes in hand, you can fix problems fast and get your boat back in gear without a lot of extra hassle.
How to Wire a Boat Switch Panel | FAQs
What is a control switch panel for boats?
Listen up – your boat’s control switch panel is your command board loaded with push buttons to run the engine, lights, and other systems. It gives you a quick, clear way to manage your boat’s vital functions.
Which tools are necessary for wiring this panel?
You need a Phillips screwdriver, flathead driver, wire strippers, pliers, cable cutters, and a voltage tester to wire this panel. Gloves keep your hands safe, too.
How should you prepare the panel before wiring?
Before wiring, clean off dust, secure loose parts, and label your cables. Kill the power, then check your setup for any flaws to ensure smooth, safe connections.
What are the wiring steps for a switch panel?
Switch off your breaker. Connect the line, load, and ground wires following your switch panel’s markings. Secure each connection firmly, restore power, and test every switch for proper function.
How do you test and maintain your switch panel?
You test your switch panel with regular load checks, a quick wiring glance, and a spot cleaning for contacts—tightening any loose bits when needed. Routine care keeps your push button switches ready for action.
