 EN
EN
Do you struggle with a horn switch that just won’t cooperate?
You’re not alone. Many car and boat owners face this issue.
In this guide, we’ll walk you through the essential components of a push button horn switch, step-by-step wiring instructions, and easy installation tips. You’ll learn how to wire your setup for optimal security and even how to add backlight features with an LED lamp. Follow along, and you’ll gain the knowledge to tackle this common problem effectively, giving your vehicle the reliable horn it deserves—whether it’s for a train horn or your everyday ride in the automotive industry.
The Components of a Push Button Horn Switch
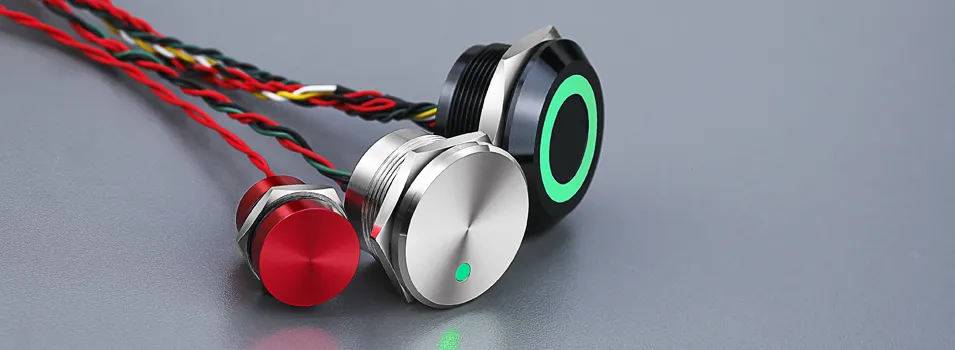
Before you start wiring your push button horn switch, let’s go over the essentials. You’ll need the right tools for this installation, along with an understanding of the common types of push button horn switches out there. Also, it’s key to know how car and boat switches differ. And hey, if you’re working on a marine application, waterproofing is a must! We’ll cover everything from pumps to solenoids, giving you the lowdown on brands, customs, and even how to find great PDFs for reference.
The Necessary Tools for Installation
When you’re gearing up to wire those horn switches, having the right tools makes a world of difference. You’ll definitely want wire strippers for quick clean cuts and an insulated screwdriver for those tight spots—especially if you’re working on a truck or a boat. And don’t forget some basic safety gear—you know, like gloves to keep you clean from metal splinters or that last bit of grime from the plastic enclosure. Grab a voltage tester, too; nothing beats that peace of mind knowing your setup is safe and sound!
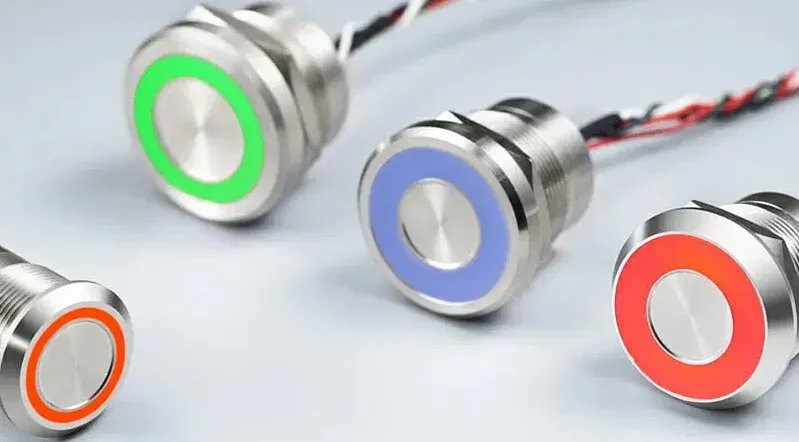
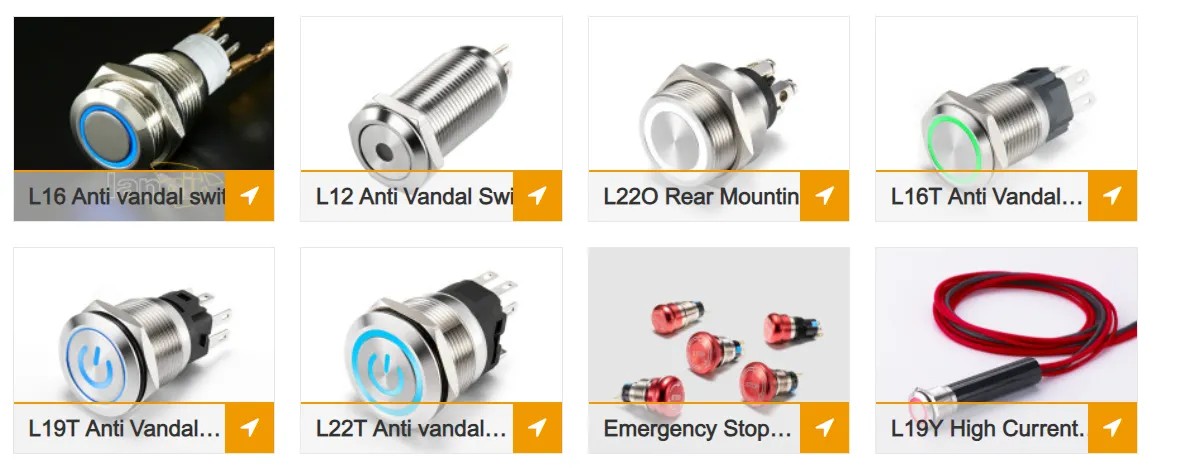
Common Types of Push Button Horn Switches
When you’re choosing a push button horn switch, it’s good to know the common types available. Some options come with an actuator that’s designed specifically for automotive use, while others might be more suited for marine applications—like a waterproof design if your boat’s getting splashed. If you’re in the United Kingdom, you might want to check out various models online and hit that “add to cart” when you find a starter switch that fits your needs perfectly—making wiring a breeze!
Differences Between Car and Boat Horn Switches
When it comes to wiring push button horn switches, car and boat switches have some key differences. Car switches are often designed to handle light loads, making them ideal for standard automotive horns, while boat switches may need to withstand harsher conditions, like water and corrosion. If you’re planning to wire a switch for a winch or remote control on your boat, you’ll want to ensure it’s waterproof and durable enough for the job—because nobody wants a failed horn in a tough spot.
- Car switches are suited for light loads.
- Boat switches should be waterproof and corrosion-resistant.
- Consider specializing switches for winches or remote controls.
- Checking your specific switch type helps prevent issues.
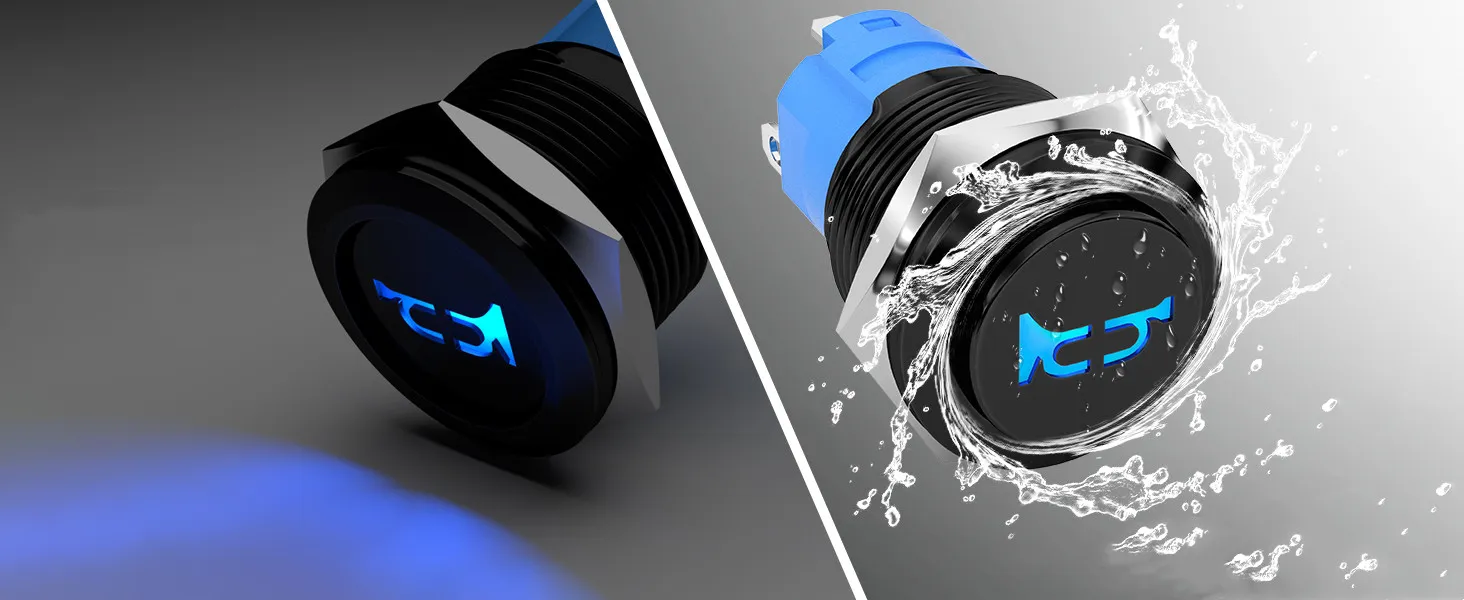
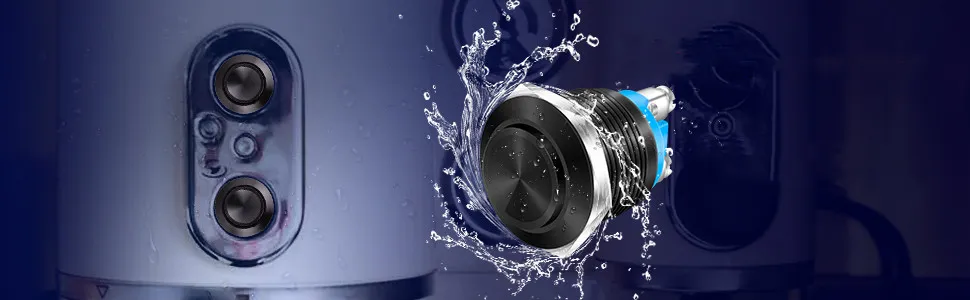
The Importance of Waterproofing for Marine Applications
Waterproofing is a game changer for marine applications. When you’re wiring a 12 volt horn button on a boat, ensure all components—especially the steel parts—are sealed against moisture. A good waterproof switch will keep your system working even when splashed by waves or rain, preventing issues that could ruin your day on the water. Remember: a reliable switch saves you from stress and keeps your airbag and accessories safe from shorts!
- Choose waterproof switches designed for marine use.
- Seal all connections to keep water out.
- Inspect your wiring regularly for any signs of wear.
- Utilize diagrams for a clearer installation process.
The Preparation Process
First, gather all your materials and equipment—you’ll need that relay, some wiring, and a solid kit car horn switch. Safety is key, so disconnect your vehicle’s or boat’s battery before diving in. Next, find the perfect spot on your steering wheel for the horn switch, making sure it’s accessible and convenient. Let’s get into the details of successfully wiring that push button!

Gather All Required Materials and Equipment
Before you jump into wiring that push button horn switch, it’s essential to have all your materials and equipment lined up. You’ll want a reliable compressor and a solid valve to get things moving. And hey, if you’ve got a flashy red horn, make sure you have the right connectors and even a spare tire lying around—just in case you run into unexpected bumps along the way. Trust me, having everything at your fingertips makes the installation process so much smoother…
Disconnect the Vehicle’s or Boat’s Battery for Safety
Before you start messing around with wiring that push button horn switch, safety first! Disconnecting your vehicle’s or boat’s battery is a must. This simple step prevents any unexpected shocks or short circuits while you’re working. Just think about it—you wouldn’t want to accidentally jump start your transmission with a stray volt. So, grab those tools, pop the hood (or hatch), and disconnect the negative terminal; it’s that easy!
Identify the Suitable Location for the Horn Switch
When you’re picking a spot for your push button horn switch, think about a few key factors. If you’re installing a car horn switch, you want it at your fingertips—easy to reach but out of the way enough not to get accidentally triggered. For a boat horn switch, make sure it’s in a place where you can grab it quickly in a pinch—after all, your safety out on the water depends on quick feedback! Also, don’t forget to consider where your circuit breaker is; you don’t want the switch too far from it, or else you’re doing a lot of extra work for nothing.
How to Wire
Start off by creating a simple wiring diagram for reference—it’ll save you headaches later. Next, connect the positive wire to the horn switch, then the negative wire to the horn system. Don’t forget to secure and insulate those connections to prevent high voltage short circuits. It’s all about keeping your setup reliable, whether it’s on your steering wheel or for your cargo boat!
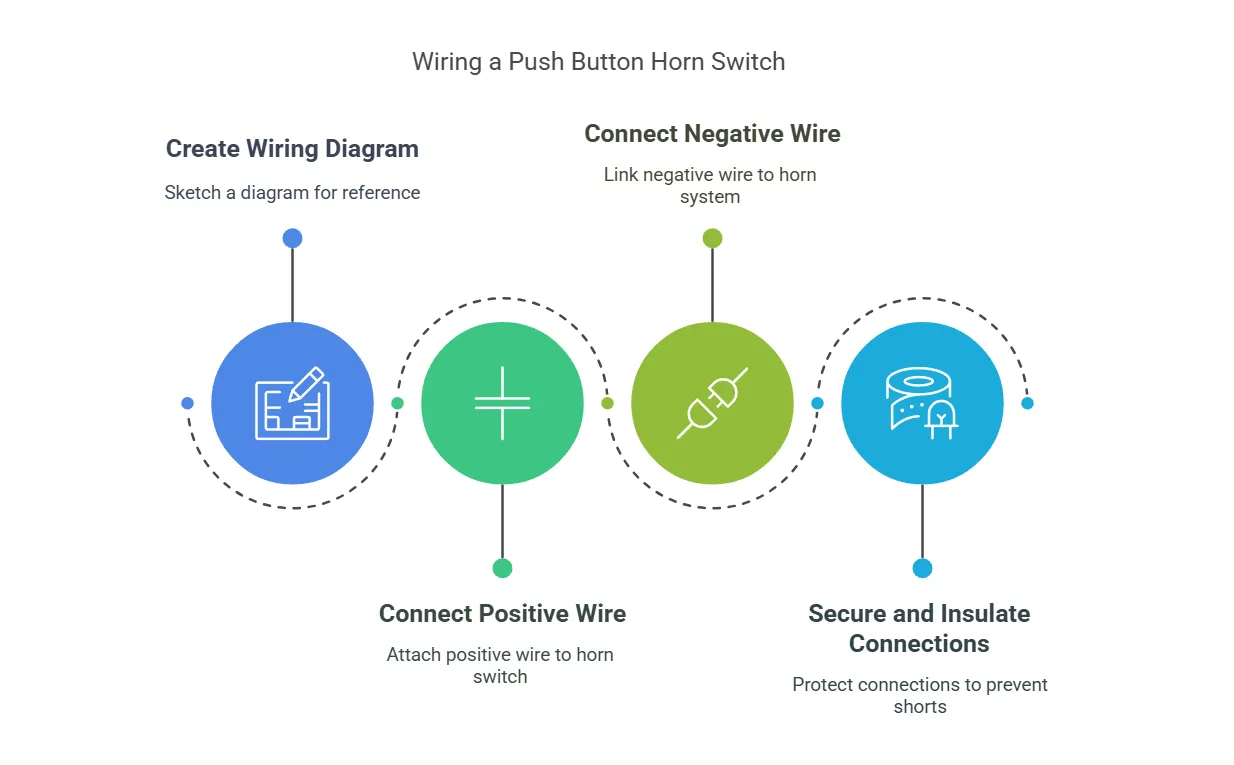
Create a Simple Wiring Diagram for Reference
Creating a simple wiring diagram for your push button horn switch is a smart move—it’ll serve as your go-to guide while you work. Grab a piece of paper and sketch how everything fits together, starting from the button on the roof, through the wire connections, and into the horn system. This visual will help you avoid any mix-ups later and make sure everything connects just right, so your horn works flawlessly whenever you need it!
Connect the Positive Wire to the Horn Switch
Now, let’s get that positive wire connected to your horn switch. Grab your wire and snake it through to the dashboard, making sure it’s long enough to reach without any stress. Strip a bit of insulation off the end and use a connector to secure it to the switch. Not only does this ensure a solid connection, but it’ll also keep your vehicle nice and tidy, just like paying attention to those brake lights that make driving a lot smoother!
Connect the Negative Wire to the Horn System
Alright, it’s time to connect that negative wire to the horn system. First, make sure you find a good spot on the system to connect—look for a grounding point. This is where the electricity needs to return, like when an electron winds down after a long day. Once you’ve got it locked in, double-check those connections because even the tiniest slip in voltage can lead to problems. You want this item to work smoothly, so don’t rush; taking your time now will save you headaches later!
Secure and Insulate Connections to Prevent Short Circuits
So, when you’re sealing those connections, think of it as the last line of defense against shorts! Use heat shrink tubing or electrical tape to wrap up your connections tight—it’s like putting a shield on your gear. This is especially important for motorcycles and boats, where moisture can sneak in and mess with your power supply. Take the time to do it right, and you’ll not only avoid costly repairs down the road but also potentially snag warranties on your equipment because everything’s in tip-top shape!
How to Install
Start by securely mounting the switch in your pre-determined location—it should be both accessible and easy to reach. After that, double-check that it’s locked down tight, away from any engine or metal parts that might interfere. Finally, test the switch operation before you finalize everything. Trust me, nothing beats the sound of that trumpet working when you need it most!
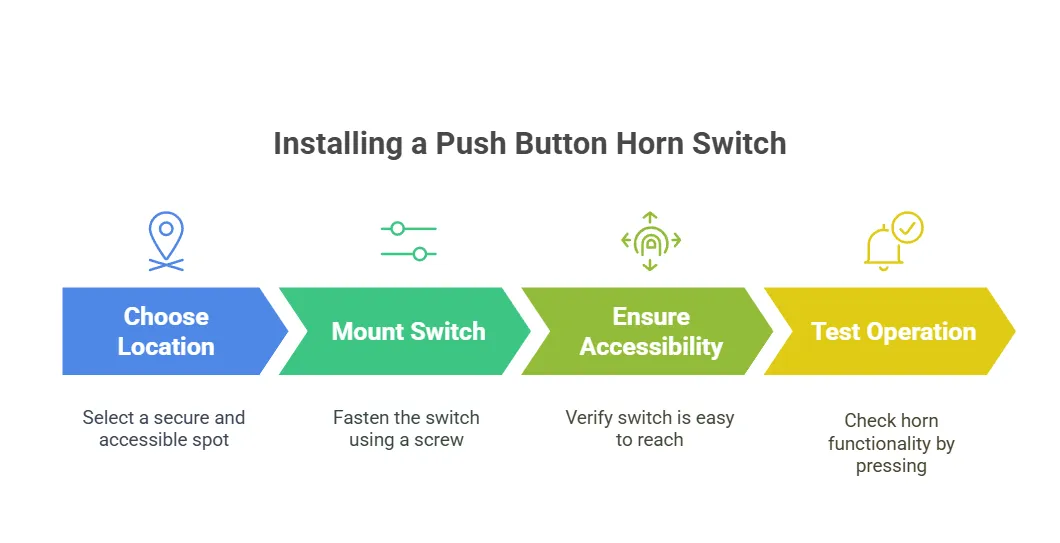
Mount the Switch in the Pre-Determined Location
When you’re ready to mount the push button horn switch, make sure it’s in a location that’s not just accessible but also safe from any bumps—think about the steering wheel or dashboard if you’re working in a car. Use a screw to secure it tightly, avoiding any areas too close to engine parts or lighting fixtures that might cause interference. For marine applications, you’ll want it positioned where you can easily reach it, even with the waves rocking the boat—because when that air horn is needed, you want it right at your fingertips!
Ensure the Switch Is Accessible and Secure
When installing your push button horn switch, it’s super important to make sure it’s both accessible and secure. You don’t want to be fumbling around in a critical moment, so find a spot that’s easy to reach—think about how it’ll work with the other factory electronics and controls. Also, keep an eye on those fuses; a loose switch could lead to blown fuses, leaving you frustrated. If you ever have questions or need guidance, don’t hesitate to contact Langir for that extra support!
Test the Switch Operation Before Finalizing Installation
After you’ve wired everything up, it’s time to test the switch operation before you wrap things up. Just press that button and listen for the horn. If it doesn’t blare, double-check those connections—sometimes a loose wire is all it takes to ruin your moment. You’ll want to make sure it works right, especially for safety on the road or out on the water. A functioning horn is crucial for alerting others, so take those few minutes to verify it’s all good to go!
Testing and Troubleshooting
First, you’ll want to conduct a functional test of your horn switch. If it doesn’t sound off, you’re likely facing common issues with the wiring. Let’s dig into fixing connectivity problems to ensure your horn performs like a champ, keeping you safe on the road or water. Quick solutions can save you from future headaches, so let’s get started!
Conduct a Functional Test of the Horn Switch
To start, you’ll want to test your push button horn switch after wiring it up. Press that button and listen carefully—if the horn doesn’t sound, that’s your cue to double-check those connections. Sometimes, a loose wire can be the culprit, so revisit your setup to ensure everything is tight and secure:
- Check the wiring for any visible damage.
- Make sure all connections are properly insulated and secured.
- Look for any signs of corrosion that could impact functionality.
Identify Common Issues With Horn Switch Wiring
When you’re dealing with a push button horn switch, a few common wiring issues can pop up and leave you frustrated. Loose connections can easily keep your horn from working, so make sure to check those wires regularly—they can wiggle loose over time, especially if you’re bouncing around on rough roads or waves. And keep an eye out for corrosion too; moisture can sneak in, especially in marine applications, causing your horn to not sound off when you need it most. A little attention can go a long way in keeping your horn reliable and ready to alert others!
Fixing Connectivity Problems for Optimal Performance
When you’re troubleshooting connectivity issues with your push button horn switch, start by checking every wire and connection you made. It’s often the loose wires messing with your signal. You might feel tempted to rush this part, but trust me, taking a second to double-check everything saves you from frustration later—especially when you just want that horn to blare when it counts!
Maintenance and Care
Regular checks are key to keeping your push button horn switch functioning smoothly. Start by cleaning and inspecting your connections for any signs of corrosion—moisture can wreak havoc! If you’re on a boat, ensure waterproofing remains intact to protect against the elements. These simple maintenance steps will help you avoid headaches and keep your horn in top shape.
Regular Checks to Ensure Functionality
To keep your push button horn switch working like a champ, make it a habit to conduct regular checks. Pop the hood or access the wiring and look at those connections for any signs of wear or damage—we’re talking about the real stuff that can ruin your day, like corrosion or loose wires. If it’s on a boat, don’t forget to check the waterproofing; saltwater can cause some serious issues if you’re not keeping an eye out. By staying proactive, you can avoid those frustrating moments when you just need that horn to work, whether you’re on the road or out on the water!
Clean and Inspect Connections for Corrosion
When you’re keeping an eye on your push button horn switch connections, checking for corrosion is a must. Grab some wire brushes or cleaning wipes to tackle any gunk that might build up over time. Especially in marine applications, moisture can sneak in and wreak havoc—so inspecting those connections regularly ensures your horn will sound off when you really need it. You don’t want to be out on the water, hitting that button and getting nothing but silence, right? Keeping it clean now saves you from headaches later!
Ensure Waterproofing Integrity for Marine Use
To keep your push button horn switch functioning on a boat, ensuring waterproofing is key. Regularly inspect your switch and connections for wear or damage from moisture—you really don’t want to find yourself without a horn when you need it. Using quality waterproof products and sealing connections will help you avoid issues, keeping everything reliable when waves get choppy:
- Check for any cracks or loose seals around the switch.
- Make sure all wires are properly insulated and protected from moisture.
- Replace any components showing signs of corrosion before they fail.
Additional Considerations for Automotive and Marine Applications
Wiring a push button horn switch for cars and boats has its own set of rules. For starters, automotive and marine wiring differ in terms of durability and environmental stresses. Using marine-rated components is non-negotiable for boats—they’re built to handle water and corrosion. Plus, you’ve got to keep safety regulations and standards in mind, ensuring your setup is not just functional but also compliant. Let’s look at these important topics closely!
Differences in Wiring for Automotive Vs Marine Use
Wiring a push button horn switch for cars versus boats has some key differences you need to pay attention to. In automotive setups, you’ll mainly deal with lighter loads and standard components, which makes things a bit simpler. But when you’re working on boats, you’ve gotta think about waterproofing and corrosion resistance—those marine environments can be brutal! So, make sure to use marine-rated wiring and switches to keep everything running smoothly, even in rough seas.
Importance of Using Marine-Rated Components for Boats
Using marine-rated components for boats is essential to ensure longevity and reliability. These components are specifically designed to withstand harsh marine environments, protecting against corrosion and water damage. By investing in marine-grade switches, wires, and connectors, you reduce the risk of failures that could leave you without a horn when safety is on the line.
- Marine-rated components resist corrosion and extend the lifespan of your system.
- They are built to handle the tough conditions found on the water.
- Using these components helps avoid failures, ensuring your horn works when you need it.
Complying With Safety Regulations and Standards
When you’re wiring a push button horn switch, following safety regulations and standards is a must. This means ensuring your wiring and components meet specific codes for both automotive and marine environments. For example, using marine-rated parts on your boat is vital to avoid corrosion and ensure reliability—nobody wants their horn failing just when they need it. Always check your local regulations and make sure everything’s up to par; you’ll not only keep yourself safe but also avoid potential hassles down the road.
Further Learning and Assistance
If you’re looking for more resources, start with recommended guides for DIY installations to help you through the process step-by-step. And if issues pop up, online forums and communities are great for troubleshooting—you’re not alone in this! For those tricky setups, don’t hesitate to reach out to professional services that can handle complex installations. Let’s dive into each of these topics for more practical insights!
Recommended Guides for DIY Installations
If you’re looking to boost your DIY skills, there are some great guides out there to help you wire a push button horn switch for your car or boat. Try checking out videos on YouTube—they break things down really well and show you exactly what to do step-by-step. Plus, online forums can be a lifesaver when you hit a snag; you can connect with others who’ve been in your shoes. Just remember, thorough research and practical resources can turn a complicated task into a fun project!
Online Forums and Communities for Troubleshooting
Online forums and communities can be a game changer when you’re tackling the wiring of a push button horn switch for cars and boats. Places like Reddit or specialized automotive and marine websites are filled with folks who’ve faced similar challenges and have valuable tips to share. You might find someone who struggled with the same issue and found a simple fix—so don’t hesitate to ask questions or read through threads; your solution might just be a click away!
Professional Services for Complex Installations
Sometimes, wiring a push button horn switch can feel overwhelming, especially if you’re staring down a complicated setup. If you’re feeling a bit out of your depth, don’t hesitate to reach out to a professional service. They have the skills and tools to tackle any challenging installations, ensuring your horn works flawlessly when you need it most.
- Consider hiring professionals for complex installations.
- Professionals bring expertise and specialized tools to the table.
- A successful installation can save you from future problems.
Push Button Horn Switch | FAQs
What are the main components of a push button horn switch?
A push button horn switch typically includes a button mechanism, housing, contacts, spring, and wires. These components work together to ensure reliable operation and safety for automotive applications.
How can I wire a push button horn switch correctly?
To wire a push button horn switch, connect one terminal to the horn and the other to the vehicle’s power source, ensuring a secure connection. Always check for any shorts or loose wires before testing the switch.
What steps do I need to install a push button horn switch?
To install a push button horn switch, first disconnect the battery, then remove the old switch. Connect the new switch’s wires to the horn and power source, secure it in place, and finally, reconnect the battery. Test the function.
How do I test my push button horn switch after installation?
To test your push button horn switch post-installation, simply connect the power, press the button, and listen for the horn sound. If it works, you’re good to go; if not, check connections or consider a replacement.
What maintenance is required for a push button horn switch?
To maintain a push button horn switch, regularly inspect for dirt or moisture, ensure connections are secure, and test functionality. Replace any corroded components and lubricate moving parts as needed for optimal performance.
