 EN
EN

Push button switches are crucial for controlling various devices, from household appliances to industrial machinery. Thanks to their simple yet effective design and multiple benefits, their market is pacing at 5% CAGR. Whether you’re an electronics fan or a DIY enthusiast, this comprehensive guide on how to wire a push button switch will help you navigate the process.
It’s crucial to understand what it actually is before we get into the details of how to wire a push button switch.

Push Button Switch – The Basics
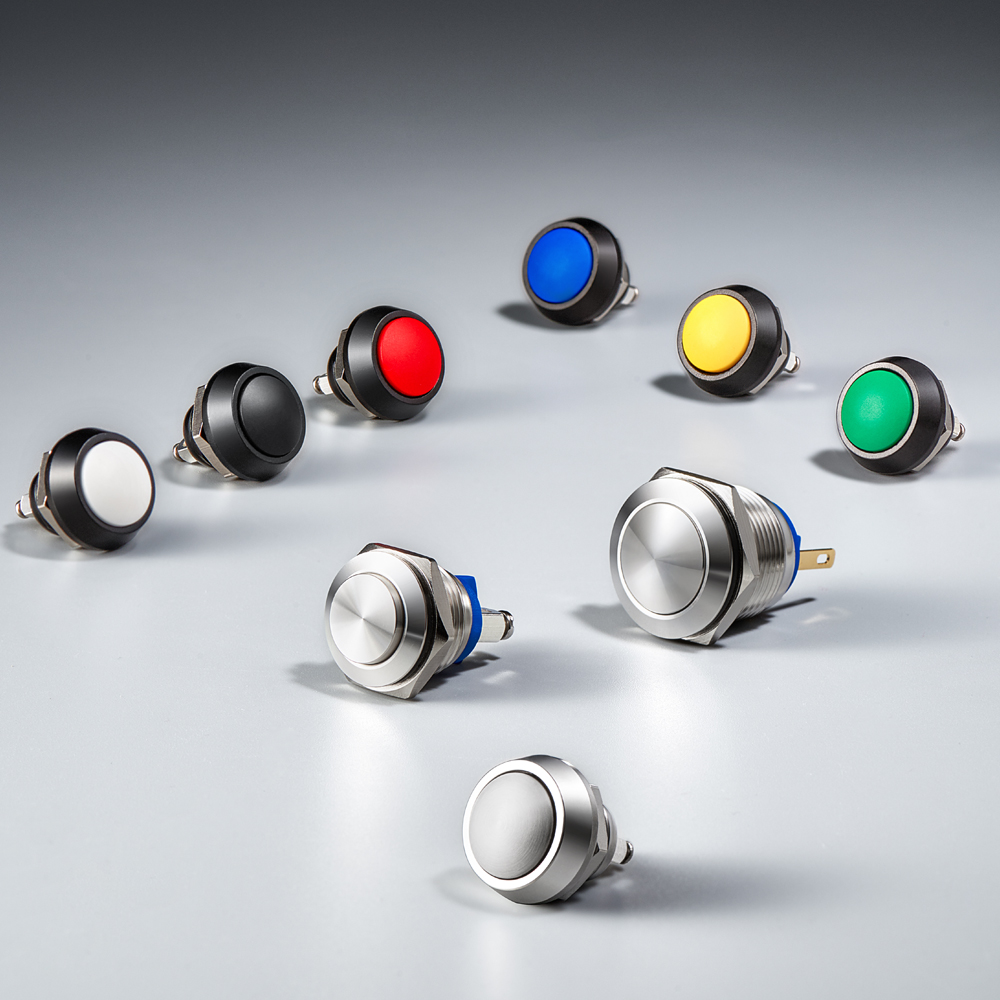
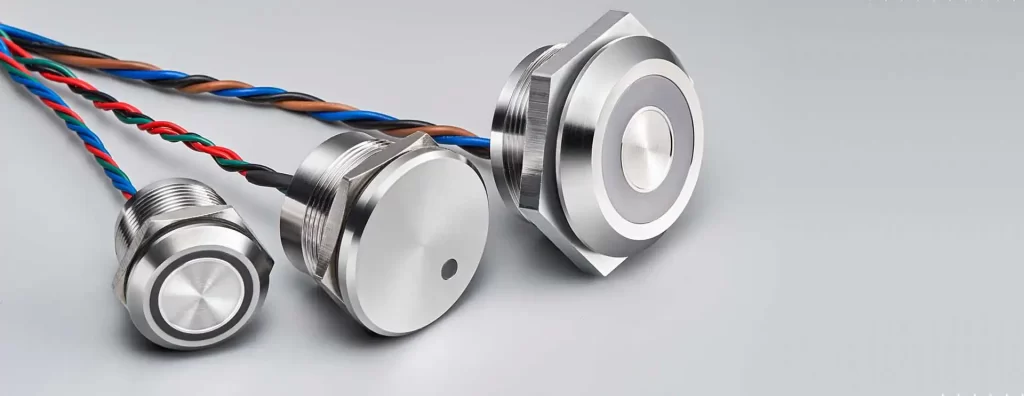
A push button switch is commonly used to control current flow in electronic circuits. Unlike toggle switches that maintain their state until flipped again, push button switches are designed to be operated by pressing the button, which returns to its original position when released.
It consists of a button or plunger connected to a set of metal contacts. A push button switch works through pressing action, completing the electrical circuit. The circuit is broken as soon as it is released, halting the current flow.
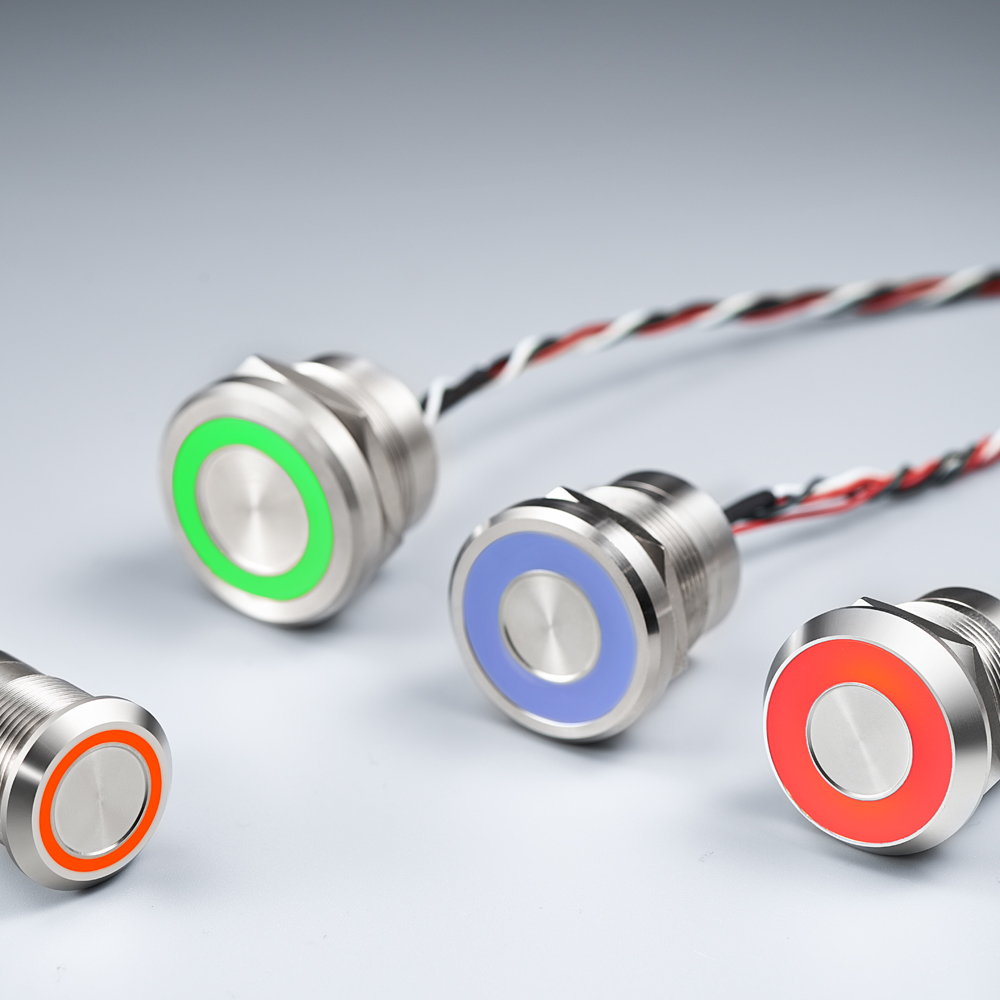
It finds applications in various devices, such as doorbells, calculators, game controllers, and automotive systems. Today, you’ll find highly reliable push button switches with features like waterproofing, scratch resistance, etc.
Momentary Push Button Switches vs. Toggle Push Button Switches
Momentary push button switches are designed to be pressed and released quickly. They only maintain the circuit connection for as long as the button is pressed, returning to its original state when released. These switches are ideal for applications requiring temporary or momentary control, such as signaling devices or push-to-talk communication systems.
Toggle or latching push button switches maintain their state once toggled until manually changed again. They are commonly used in applications where the switch must stay in a specific position, such as power on/off switches for electronic devices or light switches.
Materials Needed to Build a Push Button Switch
You will need a few materials to build a push button switch
- Wires
- Enclosure or mounting surface
- Screwdriver and related tools
- Push button
- Soldering iron and solder
- Pliers
- Super glue
- Pen knife
Now that we have covered all the basics let’s understand how to wire a push button switch effectively.
How to Wire Push Button Switch With 12V?
Follow the steps given below to wire a 12v latching push button switch.

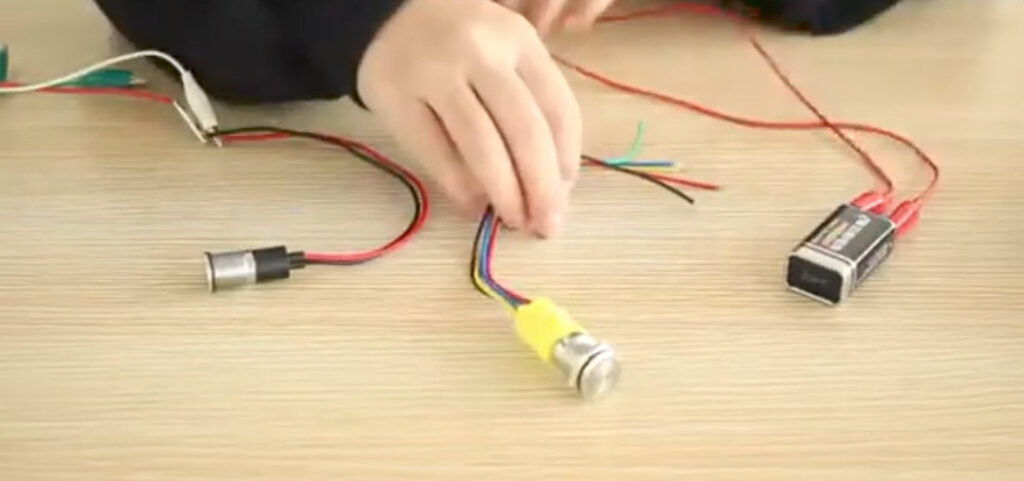
Step 1: Attach the Wires to the Push Button
Push the wire through the metallic bars/pins at the positive end of the switch button, creating a V, and twist it repeatedly to lock it in place.

Step 2: Solder the Wires
Solder the wire to the push button without overdoing it. Repeat the process for all the other wires. Make sure you blow the soldered wires to cool them down.

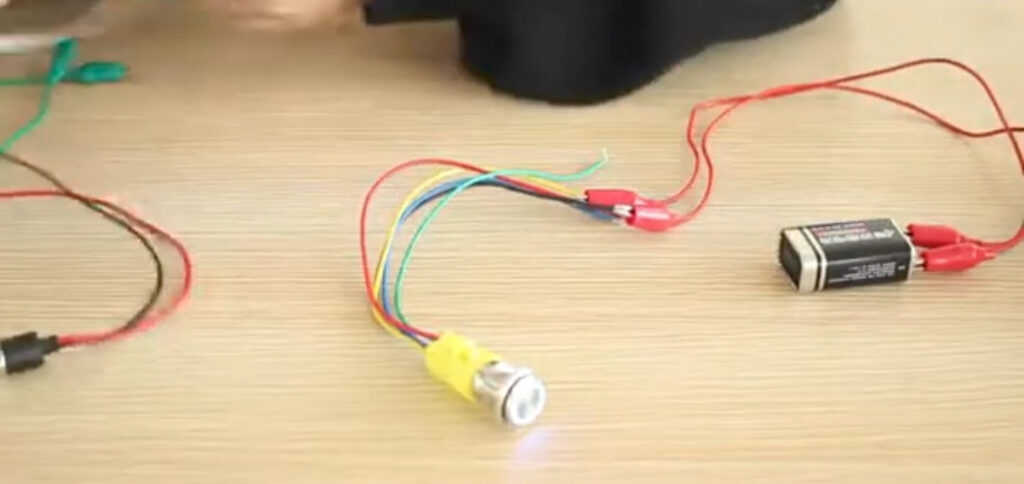
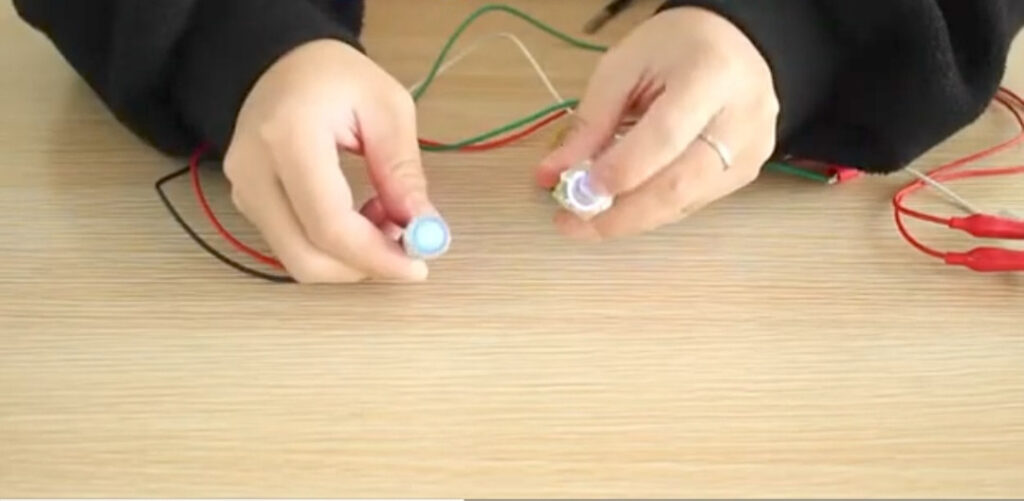
Step 3: Connect the 12v Wires
Now connect the 12v positive to the red wire and the 12v negative to the black wire of the push button. The LED will light up as a result.

Step 4: Connect the Push Button to the Load
Test the Normal Off position by connecting the blue wire to the load and the yellow to the 12v battery. As a result, the button will turn on, and pressing it will also turn the load on.

Step 5: The Backward Setup
Connect the green wire to the 12v battery and hook the yellow wire to the load.
How to Wire a Push Button Switch with 2 Pins?
Here’s a step-by-step guide on how to wire a push button switch with 2 pins:

Step 1: Connect the Power Source to the Push Button
Take both red and black wires from the battery and connect them to the push button individually.

Step 2: Complete the Circuit
Solder the wires to the push button to secure them. Once the wires are secured in their places, you can connect them to a load like a light bulb and turn it on using the push button.
How to Wire a Push Button Switch for 4 Pins?
The specific pin configuration in a push button switch for 4 pins may vary depending on the switch model. Therefore, always refer to the manufacturer’s documentation for the exact pinout. Here’s a general guideline on how to wire a push button switch with 4 pins.


Step 1: Familiarize Yourself With the Switch Pins
Most four-pin push button switches have two pairs of pins, each connected internally. You can label them pins A, B, C, and D.
Step 2: Connect the Power Source
Connect your power source’s positive and negative terminals to the push button switch pins, typically A and C.
Step 3: Hook Another Wire
Connect a wire with clips on both ends to the remaining two terminals.
Step 4: Attach the Load
Determine the pin of the push button switch corresponding to the on or off states when pressed. Connect one side of your load to this pin and the other to the ground or common connection point.
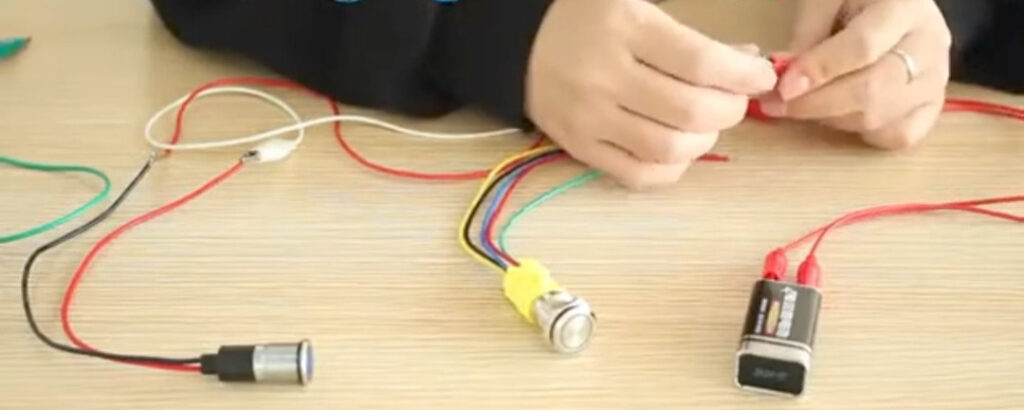
How to Wire a Push Button Switch for 5 Pins?
Here’s a step-by-step process of how to wire a push button switch for 5 pins using two different methods:
Method #1
Step 1: Use the Harness
In the first step, push the button into the harness to make wiring easier.
Step 2: Link Up the Power Supply
Connect one end of the power supply to the lamp pin on the push button. Also, hook the other end of the power supply to the second lamp pin.

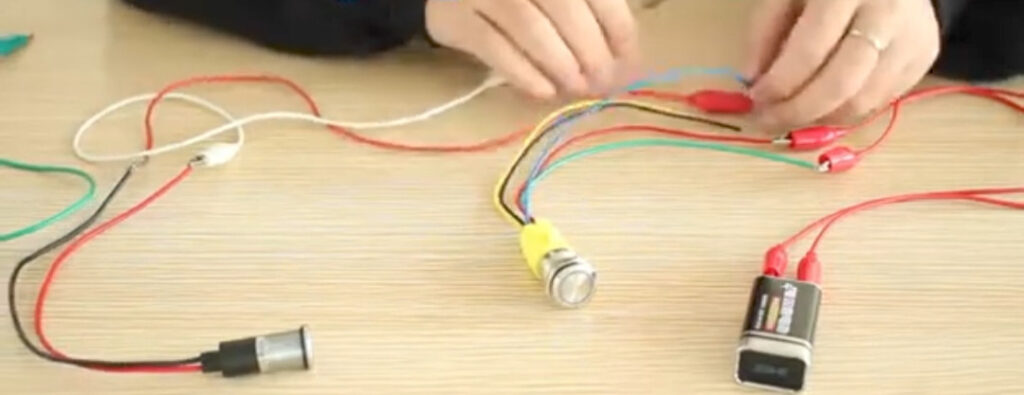
Step 3: Connect the Common Pin
Connect the common pin of the switch to one end of the input of the device and its other end to the positive side of the power supply.

Step 4: Hook Another Wire
Connect another wire and plug its one end into the common pin (the green one) of the push button.
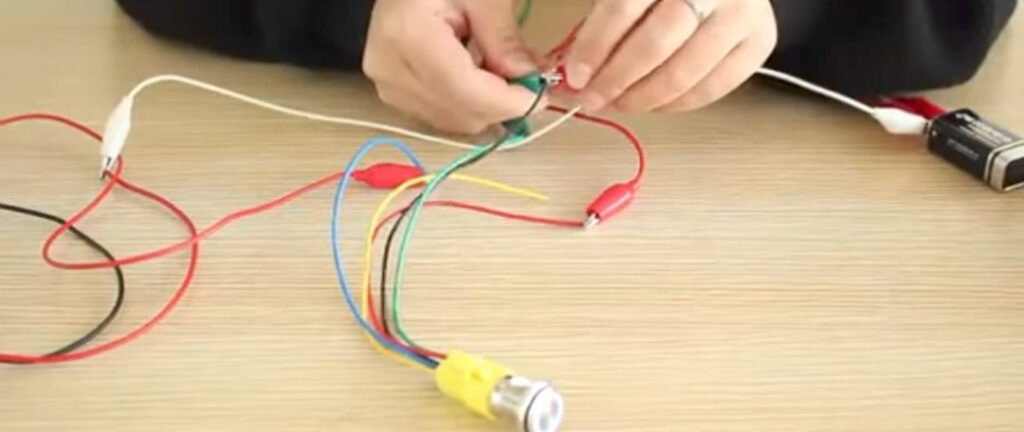
Step 5: Connect the On/Off Pin
Also, hook the new green wire with the on/off pin of the push button.
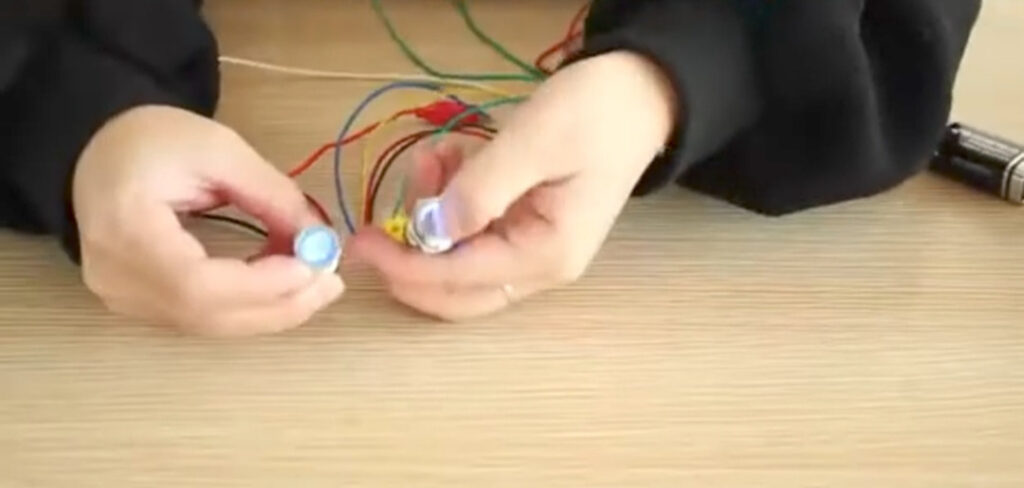
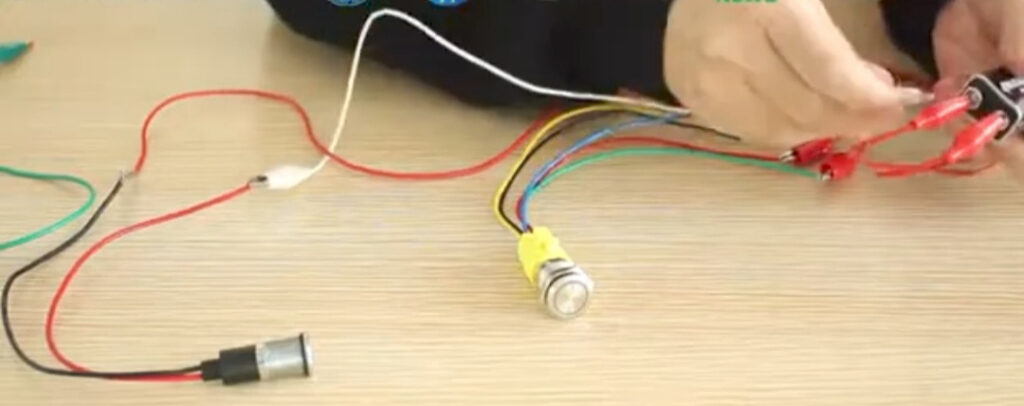
Step 6: Check the Lamp
Once you have followed the above steps, click the push button, and it’ll turn on the light, indicating that your wiring is correct.
Method #2
Step 1: Link the Power Supply
Connect the negative end of the power supply to one end of the lamp pin.
Step 2: Connect One Side of the Device
Hook one side of the device (the blue wire) to the Normally Open (NO) foot of the push button.
Step 3: Link Other Side of the Device
Connect the other side of the device (the white wire) to the negative side of the power supply.
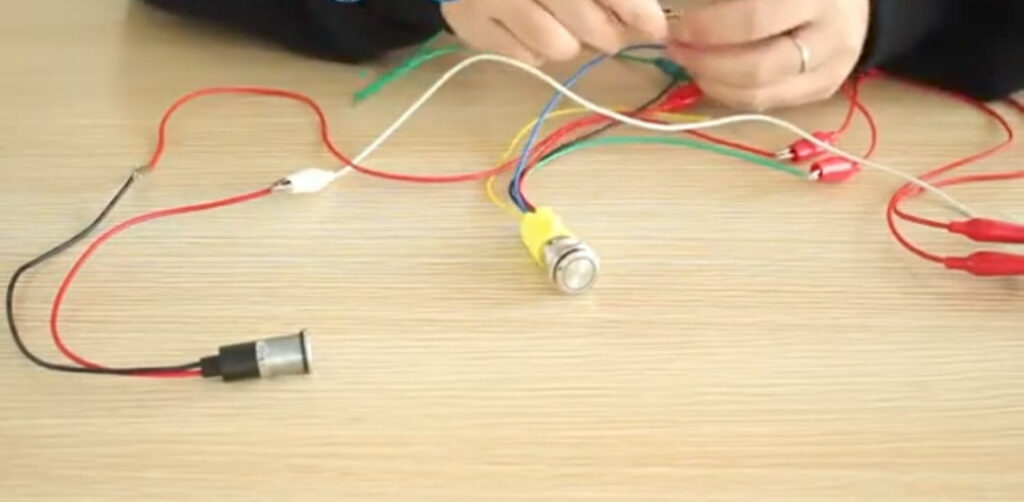
Step 4: Attach Another Wire
Take another wire (the green one); connect its one end to the Normally Open (NO) foot and the other end to the lamp pin.
Step 5: Test the Circuit
Test the circuit by clicking the push button and see if the lamp turns on. If it does, you have done the wiring perfectly.
How to Wire a Push Button Switch and Troubleshoot the Resulting Issues
Troubleshooting Wiring Problems
Here’s how to wire a push button switch and troubleshoot the most common issues:
- Check the wiring connections at both ends of the switch and tighten any loose screws or connections. If a wire is disconnected, reattach it to the correct terminal.
- Double-check the terminal connections to ensure they match the designated power input, output, and ground positions.
- If you find any, replace or cover the damaged wiring with electrical tape. Also, check for any loose strands of wire that could be touching other conductive parts and causing a short circuit.
- Check the load on the circuit and ensure it is within the switch’s rated capacity. If necessary, redistribute the load or consider using a switch with a higher current rating.
Troubleshooting Switch Issues
Follow these guidelines on how to wire a push button switch and avoid regular switch problems.
- Make sure the switch is receiving power from a reliable source. Verify that the power supply is active and supplying the correct voltage.
- It may be defective if the power source works correctly, but the switch is still not functioning. Replace the switch with a new one and test if it resolves the issue.
- Clean the switch and surrounding area using a soft brush to remove dust, dirt, or debris.
- Apply a small amount of electrical contact cleaner or lubricant to loosen any stuck parts.
- Replace the switch if it’s broken or damaged.
- Loose connections can cause intermittent functionality, so all the wiring should be secure and tight.
- Use a multimeter to check the continuity and proper operation of the switch. Follow the manufacturer’s instructions to perform the continuity test.
- Some switches may be affected by environmental conditions such as moisture or temperature fluctuations. Either relocate the switch or use something designed to withstand harmful environmental factors.
- Ensure the switch is correctly rated for the electrical load it controls. If the switch is overheating or sparking, it may be handling a higher current than it can handle. Replace the switch with a higher-rated one if needed.
- Loose or exposed wires can cause short circuits or overheating. Rectify any wiring issues and use appropriate wire connectors or insulation materials.
How to Wire a Push Button Switch – FAQs
What is the working principle of push button switch?
The push button switch follows a simple actuation mechanism that can be turned on or off by pressing the button. When it is pressed, the spring mechanism is compressed, leading to circuit completion. On the contrary, the spring mechanism returns to its original position once the button is released, breaking the circuit and stopping the current flow.
Can I wire a push button switch using different wires?
Using the appropriate wire for wiring a push button switch is important. Generally, stranded copper wire with an appropriate gauge is recommended for flexibility and conductivity. Moreover, the wire gauge should be suitable for the current rating of the switch and the wire length to minimize voltage drops.
How to wire a push button switch with the right precautions?
When working with push button switches, ensure the power source is turned off before making wiring connections. Use insulated tools and wear safety glasses and gloves. Follow electrical safety guidelines to prevent electric shocks or short circuits.
How do I troubleshoot if my push button switch is malfunctioning?
- Ensure you provide the correct voltage and check for loose or disconnected wires.
- Inspect the switch for physical damage or debris that may hinder its operation.
If these steps don’t resolve the issue, consider replacing the switch.
What is the difference between a normally open (NO) and normally closed (NC) push button switch?
The NO circuit is open, and the current doesn’t flow when the button is not pressed. However, when the button is pressed, the circuit is closed, and the current starts flowing through seamlessly.
The NC circuit works completely opposite to the NO circuit. It means that the circuit is connected when the button is not pressed but disconnected when it is pressed.
How to wire a push button switch to a horn?
Follow these steps to wire a push button switch to a horn:
- Identify the positive and negative terminals on the horn.
- Connect one horn terminal to a fused power source, typically the battery’s positive terminal.
- Attach the other terminal of the horn to one terminal of the push button switch.
- Hook the remaining terminal of the push button switch to a ground or negative source, typically the chassis of the vehicle.
- Test the horn by pressing the button.
Conclusion
Push button switches bring immense functionality and versatility to your electrical circuits. Besides knowing how to wire a push button switch, buying it from a reputable name like Langir is also crucial.
We started our journey in 2009 and have quickly established ourselves as a leading brand in the push button switch market. Langir is committed to providing quality at an affordable price and following all international manufacturing and safety standards. Moreover, our substantial R&D investments enable us to provide our customers with cutting-edge products.
So, book your order today or ask us any questions, and we’ll happily answer them all.
All Langir News:
Read More
Discover how Langir tests piezo switch durability for reliable performance in demanding environments. Learn testing methods now.
Explore piezo switch market growth projections reaching pricing varies by 2035 with 6.6% CAGR. Langir delivers sealed, IP 69K s...
Learn how to adjust piezo switch haptic feedback for optimal tactile response. Langir's sealed, IP 69K piezo switches deliver c...

Learn how piezo switches are manufactured with solid-state technology. Langir produces IP 69K sealed, ESD-proof switches for in...