
 EN
EN
Got a flush mount horn button that just won’t work right? This post breaks down the setup in short, clear steps. It covers the prep work, placement tips, and final wire connections, so you know exactly what to do. You’ll learn how to secure your installation securely and test it, solving that persistent installation headache. Enjoy a quick, no-nonsense guide to installing your flush mount horn button with ease.
Preparing for Your Horn Button Installation
Start by gathering your tools and materials, choosing the right flush mount horn button, and checking the panel, engine, and wiring connections. This includes reviewing vehicle electrical safety, disconnecting the battery, and locating the wire assembly and valve connections. Each step sets up a smooth installation process.
Contact Langir for Custom Horn Buttons
Gathering Necessary Tools and Materials
The process begins by collecting all the needed tools and materials to avoid any unexpected delays during the installation of a flush mount horn button. Knowing that the automotive industry thrives on precision, professionals suggest checking the power supply, fuse, and solenoid components early to prevent any potential issues like consequential damages:
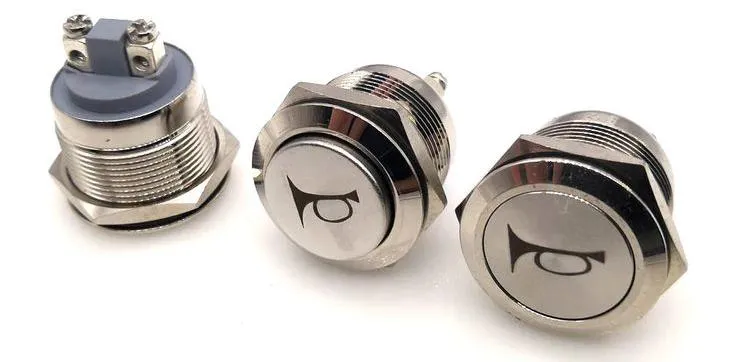
Selecting the Appropriate Flush Mount Horn Button
Choosing the right flush mount horn button is key to a smooth setup, and professionals often compare the standards of safety similar to what you would expect with cruise control systems, while keeping an eye on parts like the wheel and brake. Installing a button that fits as perfectly as a Chevrolet Chevelle in a classic run can seriously boost the smoothness of your ride. Practical know-how turns knob selection into a simple switch for confidence and reliable use.
Reviewing Basic Automotive Electrical Safety Procedures
When installing a flush mount horn button, safety always comes first. The installer double-checks the vehicle horn wiring to avoid any electrical mishaps, taking care in troubleshooting potential issues before they arise. This process is as important as when a sedan driver clicks “add to cart” online, ensuring that every signal from the vehicle matches the needs of a secure setup.
Disconnecting the Vehicle Battery Before Starting Work
Before starting work, it is crucial to disconnect the vehicle battery to cut the volt supply and ensure there is no unintended current flow. Experienced technicians inspect the wiring diagram and check the ground before proceeding, applying extra attention to any exposed parts that might need an insulator. This simple step prevents shocks and keeps the entire installation process safe and smooth.
Locating Your Vehicle’s Existing Horn Wires
The seasoned expert checks around the steering column and behind the dashboard, following the wire trail with the same care as inspecting a tire for air leaks. The technician finds the switch connection with a calm precision that even a boat captain would appreciate, ensuring every detail of the horn setup is sound.
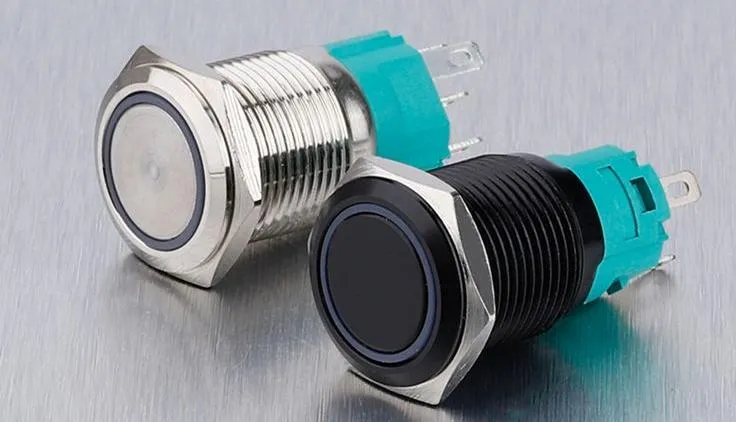
Choosing the Optimal Mounting Location
They assess the dashboard or panel for a clean, accessible spot for the air horn. They verify clearance behind the titanium surface and mark the button placement with a reliable tool. Horn button installation details cover ensuring easy access for the driver while keeping in mind that limited warranty terms apply.

Contact Langir for Custom Horn Buttons
Evaluating Dashboard or Panel Suitability
When assessing a dashboard or panel for a flush mount horn button, the expert ensures there is enough room to avoid interference, checks for signs of corrosion, and confirms the sep fits well, keeping in mind design influences from South Africa and the United Kingdom:
- Dashboard space assessment
- Corrosion inspection
- SEP alignment check
- South Africa design compatibility
- United Kingdom standards compliance
Ensuring Easy Access for the Driver
The expert makes sure the button sits in a spot that lets the driver reach it without extra stretch, like a well-timed train leaving the station. She checks that the wire stripper is on hand for any tweaks, applies waterproofing to prevent leaks, and even gives a light brush over the area for a clean, crisp finish. Skilled with tools and internet-sourced tips, every detail is set for a smooth and quiet installation.
Verifying Clearance Behind the Mounting Surface
When checking for clearance, the technician makes sure the area behind the mounting surface is free of obstructions, ensuring the push button’s commutator and screw terminal are properly aligned, and even contacts an authorized toyota dealer at email protected for doubts; this method avoids any installation headaches and streamlines the setup process:
- Clear the area behind the panel
- Confirm proper alignment of the push components
- Verify commutator and screw terminal placement
- Consult an authorized toyota dealer if needed
Accurately Marking the Button Placement
The expert marks the button placement with a clean line drawn from a detailed diagram, using a trusted screwdriver as a guide while keeping the schematic in view. Precision is key—any misalignment might throw off the trumpet of your installation, so it’s smart to contact Langir if doubts arise along the way.
Securing the Flush Mount Horn Button
They check the opening size for the push button horn switch, prep the mounting area with a clean surface, and fasten it tightly, using a stripper and aligning the terminal. This keeps the installation neat and cost-effective, ensuring the proper price for quality. The guide continues with practical steps for a firm, smooth finish.

Contact Langir for Custom Horn Buttons
Creating the Correct Size Opening for the Switch
The expert uses a drill to create a precise opening that matches the factory specs, ensuring the push button horn switch fits perfectly into the panel. With solid maintenance tips and gear recommendations in hand, the installer encourages readers to explore careful measurements for a hassle-free setup.
Preparing the Mounting Area Surface
The expert starts by clearing and cleaning the mounting area to boost the button’s power and ensure an optimal sound effect when pressed, all while keeping a careful eye on each detail like a seasoned truck inspector on the road. The work mimics the coordination of a well-tuned network, where every step makes the installation a bit smoother and more reliable. This prepared surface makes the actual setting in of the button straightforward and safe.
Fastening the Push Button Horn Switch Firmly
The expert makes sure the push button horn switch stays in place by tightening the screws down firmly and checking the wiring path with an ohm meter, ensuring every electron travels the right way. Using electrical tape for extra security, the tech treats the installation like tuning up a jeep wrangler for off-road reliability, all while keeping an eye on the headlamp alignment for a safe, hassle-free ride.
Achieving a Neat Installation Finish
The expert ensures a neat finish by tightening the screw until it holds like a secure lock on a cart, double-checking each connection while keeping the pump level and the spare tire ready for any surprise twists, much like setting up a train horn that’s reliable and firm. The installer treats every detail with steady hands, ensuring that the flush mount horn button installation exudes quality and practicality.
Completing the Horn Button Wire Connections
The process continues by following a push button horn wiring diagram. The expert explains attaching the horn button wire to switch contacts, routing wiring away from moving parts or heat sources, tapping into the factory horn relay system, and wiring a car horn to a switch independently. This flush mount horn button setup ensures strong electricity flow for a coupe’s reliable relay and electrical wiring.
Contact Langir for Custom Horn Buttons
Following a Push Button Horn Wiring Diagram
The expert follows a push button horn wiring diagram to ensure the switch routes power smoothly without getting exposed to excessive heat along the road, keeping the soldered connections secure near the steering wheel, and prepares to reply to any issues quickly when troubleshooting:
Attaching the Horn Button Wire to Switch Contacts
The expert makes it a point to connect the horn button wire to the switch contacts by carefully aligning copper strands and confirming the connection with a multimeter, ensuring no damage occurs during the setup process. The technician, who treats every installation with the same trust as an implied warranty on a compressor, checks the wiring to guarantee smooth operation every time.
Routing Wiring Away From Moving Parts or Heat Sources
The expert ensures wiring stays clear of moving parts and heat sources to prevent unwanted noise in the vehicle and avoid any damage to metal components, keeping the installation secure and reliable under warranty. Like well-written javascript, every connection flows logically and safely, ensuring every twist of wire works exactly as intended without any unexpected interruptions.
Tapping Into the Factory Horn Relay System
The expert taps into the factory horn relay system by using a precise crimp tool that secures the wiring near the steering column, ensuring seamless communication between components. With an approach as smooth as swiping a credit card and checking an online account, the installation guarantees that every electrical connection is tight and reliable for a worry-free ride.
Steps for How to Wire a Car Horn to a Switch Independently
The expert outlines clear steps for wiring a car horn to a switch independently while handling high voltage connections with care, avoiding any negligence that could compromise the system’s safety. The process involves checking the integrity of plastic insulators and steel components, ensuring the setup is as reliable as a well-maintained jeep:
- Secure and test all wiring connections.
- Use appropriate insulators for high voltage areas.
- Avoid any risk of negligence by double-checking every link.
- Confirm the stability of both plastic and steel fixtures.
Final Steps and System Testing
Reconnecting the battery, testing the horn’s functionality, and confirming secure wire connections wrap up the flush mount horn button installation. The expert also reinstalls any removed interior components, ensuring every connection is spot on. Each step keeps the system safe and reliable, setting the stage for a smooth, effective performance.
Reconnecting Power by Attaching Battery Terminals
The expert carefully reconnects the battery terminals, ensuring every connection is secure and following the wiring diagram exactly, so the newly installed flush mount horn button gets all the power it needs to function flawlessly. Every step counts, and double-checking the tightness of each terminal makes sure the engine roars with confidence and safety. The installer advises a quick test after the reconnection to catch any loose wires before calling it a day.
Testing the New Horn Button Functionality
The expert tests the new horn button by reconnecting the battery and applying a quick press to ensure a solid electrical connection. A multimeter confirms that voltages match expected values, and this active check keeps the setup reliable. One simple press tells everything is ready, leaving no room for guesswork.
Confirming Secure Wire Connections
The expert methodically inspects every wire connection, confirming stability with an ohm meter and ensuring all points sit tight. The expert then outlines key checkpoints for wire security before system testing:
- Check for consistent electrical flow
- Ensure each terminal has firm contact
- Review connections with precise measurements
Reinstalling Any Removed Interior Components
The technician reinstalls any missing interior parts with a careful eye, ensuring every bit fits snug like in a well-oiled machine. This method keeps the vehicle’s wiring neat and system functionality top-notch, reflecting hands-on expertise in push button switch installations. Every reattached component adds to the overall reliability and peace of mind for a smooth ride.
Addressing Potential Horn Button Installation Issues
The expert checks for a horn that won’t fire, a button stuck on, or random activations. They also verify grounding and inspect fuses and relays. Each step keeps the push button switch installation smooth and reliable while nailing down the issues that might occur.

Contact Langir for Custom Horn Buttons
What to Check if the Horn Fails to Operate
When the horn won’t operate, the expert insists on rechecking all wiring connections, testing them one by one to spot any weak link:
- Review battery connections
- Measure voltage with a multimeter
- Inspect fuse and relay conditions
This method helps pinpoint and address the issue without delay.
Resolving a Horn That Stays on Constantly
The expert inspects the wiring carefully and checks for accidental shorts when a horn stays on constantly, ensuring every connection is secure and insulated properly to stop unwanted signals:
Fixing Sporadic Horn Activation Problems
The expert tackles sporadic horn activation by checking all wiring connections and confirming that no stray voltage lingers. A simple inspection helps pinpoint loose connections or contamination, and tightening them usually fixes the issue. The process keeps the installation smooth and reliable, ensuring the horn responds only when needed.
Confirming Proper Grounding for the Horn Circuit
The expert double-checks the grounding path to make sure the horn circuit stays reliable, using a multimeter to confirm no stray resistance disrupts the flow. This careful step saves time later, ensuring that every press transfers power only where it’s meant to go without any unwanted surprises.
Inspecting Fuses and Relays in the Horn System
The expert checks each fuse and relay in the horn system with a clear, methodical process that catches loose links and worn parts before they become a hassle. Using a multimeter and visual inspection, they make sure every connection is stable and secure, paving the way for a dependable setup:
- Test each fuse for proper continuity
- Examine relay contacts for signs of wear
- Replace any components that look faulty
How to Install a Flush Mount Horn Button | FAQs
What tools are needed to install a flush mount horn button?
You need a drill, screwdriver, measuring tape, and safety goggles. These tools help secure the flush mount horn button precisely and safely.
How do you choose the best mounting location?
Pick a spot that’s safe, well-ventilated, and easy to access. Avoid areas with extremes in temperature or humidity. Ensure it fits your push button setup securely for steady, dependable performance.
What steps secure the horn button flushly?
Ensure the horn button is flush by aligning components correctly, securing all screws evenly, and inspecting the seal tightness. Testing the operation confirms it’s properly fastened and ready for use.
How do you connect horn button wires safely?
When connecting horn button wires, first cut off power. Strip a bit of insulation and secure the wires tightly to the terminal screws. Test each connection to avoid any loose strands before final installation.
What common installation issues should be addressed?
Common installation issues include poor wiring connections, misaligned mounting, missing fasteners, and lack of adherence to safety guidelines. These can lead to unreliable performance of push button switches and potential downtime.
