
 EN
EN
Mounting a boat switch panel incorrectly can lead to water intrusion, corrosion, and power failures just when you need your navigation lights or bilge pump the most. This guide will walk you through the precise steps to mount a boat switch panel—from selecting the ideal location to wiring, troubleshooting, and even ordering custom push button switches in bulk for industrial applications. Here’s what we’ll cover:
- Understanding marine switch panels and the importance of solid mounting
- Planning the location, measuring cutouts, and gathering necessary tools
- Step-by-step panel installation and waterproof sealing
- Safe wiring practices, circuit protection, and grounding
- Maintenance, corrosion prevention, and troubleshooting
- Customization options, bulk ordering benefits, and contacting Langir
- Key safety standards and marine best practices
What Is a Boat Switch Panel and Why Is Proper Mounting Important?
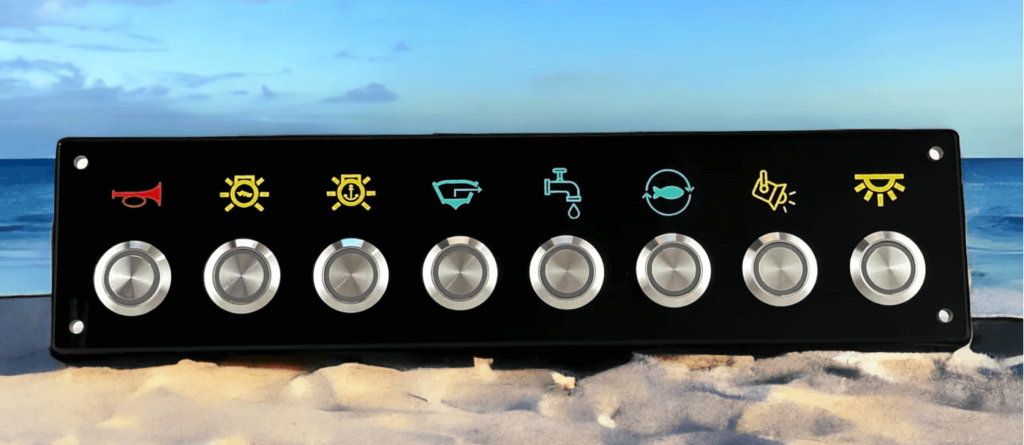
A boat switch panel serves as a centralized control unit, housing individual push button switches, circuit breakers, and fuses to manage marine electrical loads. Proper mounting secures the panel’s enclosure, prevents vibration damage, and ensures waterproof integrity—enhancing onboard safety and reliability. Understanding this control hub is crucial for planning, cutting, and wiring your panel correctly.
Get a quote for custom panel-mount switches from Langir
What Are the Key Components of a Marine Switch Panel?
A marine switch panel typically includes push button switches, circuit breakers, bus bars, and wiring terminals that distribute power safely to accessories. Below is an Entity-Attribute-Value breakdown of core parts:
These components create a cohesive control panel that integrates seamlessly with the marine electrical system, which we’ll explore next.
Why Choose Waterproof and Marine-Grade Switch Panels?
Marine environments expose panels to salt spray, UV light, and vibration. Waterproof enclosures use gaskets and IP-rated seals to block moisture, while marine-grade materials resist corrosion and flex under load. Selecting panel housings and switches rated for 12 V or 24 V systems improves lifespan and reduces maintenance.
Importance of Waterproofing in Marine Environments
Marine environments expose electrical components to moisture, salt spray, and UV light, which can lead to corrosion and failure. Waterproof enclosures and marine-grade materials are essential for protecting switch panels and other electrical components from these harsh conditions, thereby extending their lifespan and ensuring reliable operation.
Marine Electrical Systems Handbook (2022)
This citation reinforces the article’s discussion on the necessity of waterproof and marine-grade components for longevity and safety in boat switch panel installations.
How Does a Switch Panel Fit into the Marine Electrical System?
A switch panel sits between the battery bank (via a battery switch or isolator) and your boat’s accessories, routing power through circuit breakers to each load. It centralizes control for lights, pumps, electronics, and instruments, making system management intuitive and enhancing safety by localizing fuses and breakers near the helm.
How to Choose the Right Location and Prepare for Marine Switch Panel Mounting?
Choosing a stable, accessible location ensures dash visibility and structural support for the panel’s weight and wiring loads. Preparation involves measuring available space, identifying cable routes, and verifying backing support to anchor screws without flex.
What Are the Best Mounting Locations on a Boat for Switch Panels?
Optimal panel sites balance visibility, accessibility, and structural backing.
- Helm station or instrument cluster for direct line-of-sight control
- Console sides where wiring runs are short and protected
- Overhead compartments with reinforced backing plates
Locating the panel near the helm streamlines operation and simplifies wire runs to batteries and accessories.
How to Measure and Mark Panel Cutouts for Accurate Installation?
Measure panel dimensions and use masking tape to outline the cutout. Verify the outline with a square or template to maintain straight edges. Mark drill points for mounting screws, ensuring they clear internal components and wiring channels.
Which Tools and Marine-Grade Materials Are Needed for Mounting?
You’ll need marine-grade tools and materials that resist corrosion and ensure waterproofing:
- Tinned copper wire and marine-grade heat-shrink tubing
- Crimping tools with insulated terminals
- 12 mm–18 mm hole saw for switch and panel cutouts
- Stainless steel screws and nylon washers
- Marine sealant (polyurethane) and waterproof gaskets
These supplies establish a robust mounting foundation, leading into cutting and securing the panel properly.
What Are the Step-by-Step Instructions to Mount a Boat Switch Panel?
Mounting a boat switch panel involves cutting a precise opening, seating the panel flush, and sealing all edges to maintain waterproof integrity. Follow these steps for a snug, vibration-resistant installation.

Get a quote for custom panel-mount switches from Langir
How to Cut and Prepare the Mounting Hole for the Switch Panel?
- Trace the panel’s cutout template onto the helm surface.
- Drill pilot holes at each template corner to guide the saw.
- Use the appropriate hole saw or jigsaw to cut along the marked outline.
- Sand edges smooth and remove debris before fitting the panel.
Accurate cutting ensures the panel sits flush, preventing gaps that could compromise waterproofing.
How to Secure the Switch Panel Using Screws and Waterproof Seals?
Secure the panel with stainless steel screws and nylon washers to resist corrosion. Apply a continuous bead of marine polyurethane sealant around the cutout before seating the panel. Tighten screws incrementally in a cross pattern to compress the gasket evenly and create a watertight seal.
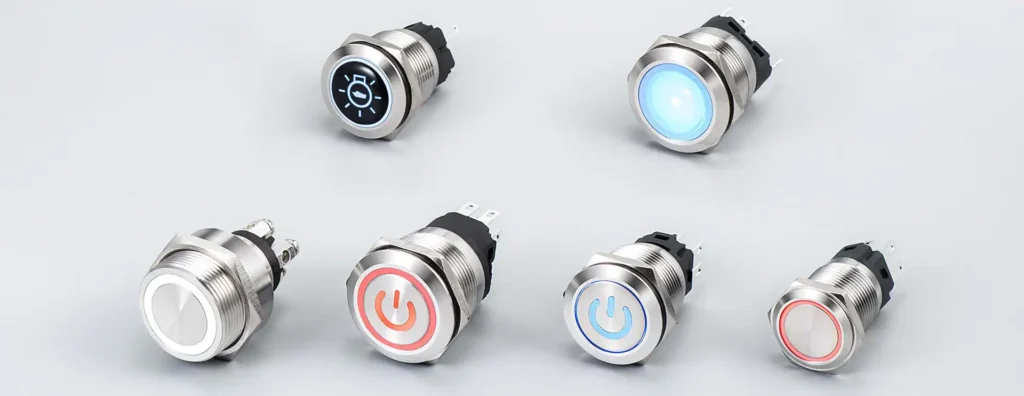
How to Install Push Button Switches into the Panel Correctly?
Install Langir’s push button switches by pushing each switch through its pre-cut hole until its mounting flange seats fully. From the backside, tighten the bezel nut to the manufacturer’s torque specification. Crimp and attach tinned copper terminals to switch posts, then secure with heat-shrink tubing to seal connections against moisture.
How to Wire a Boat Switch Panel Safely and Effectively?
Wiring a switch panel involves routing power and ground correctly, adding circuit protection, and following ABYC guidelines to prevent shorts and corrosion.
What Are the Three Main Wires on a Boat Switch Panel and Their Functions?
- Power feed (red) from the battery or bus bar to the panel’s main input
- Ground return (black) connecting the panel ground bus to the negative battery terminal
- Output leads (various colors) from each switch to downstream accessories
These wires form the backbone of safe power distribution, ensuring each device gets its dedicated circuit.
How to Connect Circuit Breakers and Fuses for Overload Protection?
Circuit breakers mount on the panel’s front face or bus bar, while fuses sit in inline holders. Wire the battery feed into each breaker input, then route the breaker output to the switch input. Inline fuse holders on output leads offer secondary protection. This dual-layer approach limits damage from overloads or shorts.
What Are Best Practices for Marine Switch Panel Wiring and Grounding?
Marine wiring follows ABYC standards for gauge, routing, and termination:
- Use tinned copper wire sized per circuit amperage
- Secure wires with marine clamps and avoid chafe points
- Tie ground wires to a dedicated bus bar bonded to the battery negative
- Apply corrosion inhibitor on all terminal connections
How to Use Bus Bars and Battery Switches in Panel Wiring?
A bus bar centralizes positive or negative connections, minimizing wire count and improving serviceability. A heavy-duty battery switch sits between the battery bank and panel input, allowing isolation of the entire panel for maintenance or emergency shutdown.
How to Troubleshoot and Maintain Your Boat Switch Panel After Installation?
Routine inspection and preventive care extend panel life and prevent electrical mishaps in saltwater conditions.
Get a quote for custom panel-mount switches from Langir
What Are Common Issues with Boat Switch Panels and How to Diagnose Them?
Common faults include switch failure, blown fuses, and loose terminals. Perform a visual check for corrosion, test continuity across switches, and verify voltage at each breaker using a multimeter. Identifying hotspots or intermittent connections prevents unexpected failures.
How to Prevent Corrosion and Extend Panel Longevity?
Keep panel interiors dry with moisture-absorbing packets and re-seal gasket joints annually. Apply dielectric grease to all terminal connections and inspect tinned copper wires for fraying. Regular cleaning and lubrication of switch contacts preserve conductivity.
When and How to Replace Push Button Switches or Circuit Breakers?
Replace switches showing pitting or stiffness in their actuator. Swap circuit breakers that trip under normal loads or fail manual resets. Always match replacement parts to original specifications (IP rating, amperage) and install genuine marine-grade components.
How to Customize and Bulk Order Marine Push Button Switches for Industrial Applications?
Langir offers customizable push button switches designed for high-volume marine OEMs requiring tailored features and reliable waterproof performance.
What Customization Options Are Available for Marine Switch Panels?
Customization spans actuator color, backlighting, engraving, and terminal configurations.
The table below outlines common options:
How Does Bulk Purchasing Benefit Industrial Manufacturing Companies?
Ordering switches in bulk reduces per-unit cost, streamlines inventory management, and guarantees consistent component quality across production runs. Volume discounts and standardized parts accelerate assembly and lower total cost of ownership for OEM projects.
How to Contact Langir for Custom Switch Panel Design and Orders?
Reach out to our specialists through the Contact Us page to discuss your industrial-scale needs. Our team will guide you through customization, quoting, and expedited bulk manufacturing timelines.
What Safety Standards and Best Practices Should You Follow When Mounting a Boat Switch Panel?
What Are the ABYC Standards for Marine Electrical Installations?
ABYC Standards for Marine Electrical Installations
The American Boat and Yacht Council (ABYC) provides standards for marine electrical systems, including wiring methods, circuit protection, and panel mounting. These standards are designed to ensure the safety and reliability of electrical installations on boats, reducing the risk of fire and electrical shock.
American Boat and Yacht Council, ABYC Standards for Small Craft (2024)
This citation supports the article’s emphasis on adhering to ABYC standards for safe and compliant marine electrical installations.
ABYC E-11 outlines requirements for wiring methods, circuit protection, and panel mounting:
- Secure wiring runs within two inches of entry into the panel
- Use circuit breakers with manual reset
- Bond metallic panel enclosures to the negative ground system
How to Ensure Waterproofing and Corrosion Resistance in Panel Installation?
Select IP67-rated panels, apply gaskets and sealants to all joints, and use stainless steel hardware. Corrosion inhibitors on terminals, tinned copper wiring, and routine seal inspections maintain system integrity in saltwater environments.
What Are Recommended Wire Gauges and Overload Protections for Marine Panels?
Use EAV formatting for common marine circuits:
Every installation step from panel selection to wiring and sealing reinforces a safe, reliable marine electrical system. Regular maintenance, adherence to ABYC standards, and quality components like Langir’s customizable push button switches ensure worry-free operation on the water.

