
 EN
EN
Installing a switch in an access panel is crucial for the reliability of your control system, especially in industrial settings. This guide provides you with clear, step-by-step instructions on switch selection, panel preparation, precise mounting, wiring best practices, safety protocols, troubleshooting, and insights on bulk customization. Achieve a secure, durable installation every time. Discover common switch types, IP/NEMA ratings, essential tools, and cutout techniques. Learn how to seal and torque hardware correctly, explore wiring diagrams for momentary and latching configurations, and follow essential lockout/tagout steps. We’ll also show you how Langir’s OEM/ODM services and wholesale push button switch supply can streamline your next project.
Exploring Switch Types for Access Panels
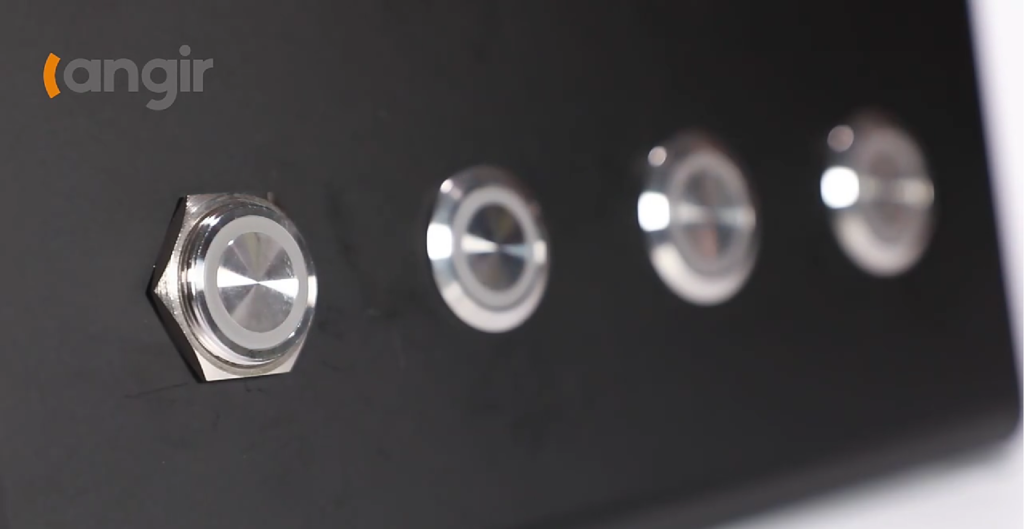
Choosing the right switch type is vital for matching the control function, durability, and environmental demands of your application. Industrial push button switches, toggle switches, rocker switches, and anti-vandal designs each play unique roles in machinery start/stop, safety interlocks, or user interfaces.
Get a quote for custom panel-mount switches from Langir
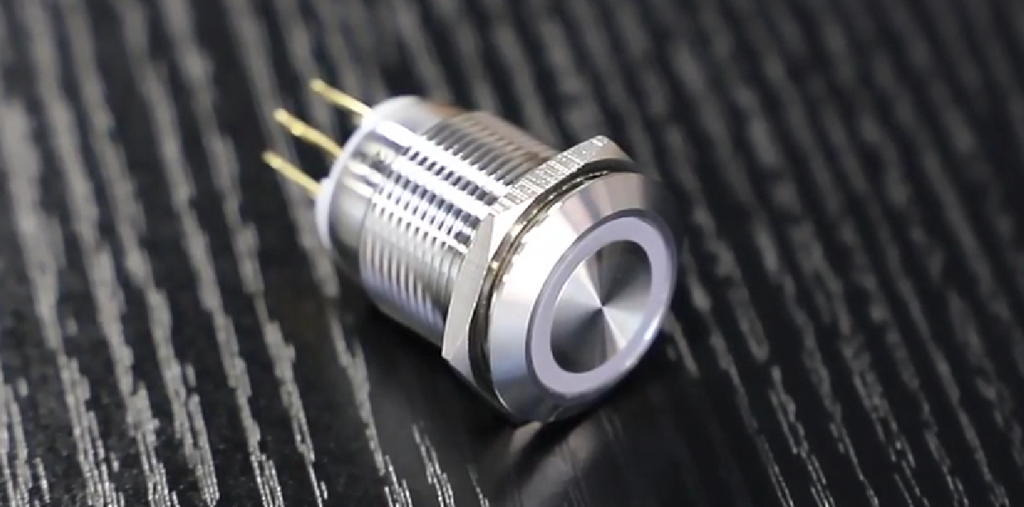
Understanding Panel Mount Switches and Their Components
A panel mount switch is designed to integrate seamlessly onto an access panel by inserting its barrel through a cutout and securing it with a nut, ensuring reliable actuator control and an environmental seal.
Key components of a panel mount switch include:
- Actuator: The external button or lever that engages the contacts.
- Barrel (Housing): The threaded cylinder that fits through the panel cutout.
- Terminals: Connection points labeled NO, NC, and Common for wiring.
- Gasket: A rubber or silicone seal placed between switch body and panel.
- Mounting Nut & Washer: Hardware that secures the switch to the panel with specified torque.
Each component works in harmony to ensure switch stability under industrial vibration and maintain IP/NEMA protection, guiding your installation choices.
Panel Mount Switch Components
Panel mount switches consist of several key components, including an actuator, barrel (housing), terminals, a gasket, and mounting hardware. These components work together to ensure switch stability and environmental protection, such as IP/NEMA ratings, which are crucial for industrial applications.
National Electrical Manufacturers Association (NEMA), NEMA Standards Publication (Various Years)
This citation supports the article’s description of the components of a panel mount switch and their functions.
Comparing Momentary, Latching, and Anti-Vandal Switches
Momentary, latching, and anti-vandal switches differ in contact behavior, user feedback, and ruggedness:
- Momentary Switch – Returns to its default position when released, ideal for push-to-start or reset functions.
- Latching Switch – Maintains its position until actuated again, suitable for on/off control in machinery.
- Anti-Vandal Switch – Features a reinforced metal bezel and heavy-duty internal springs to resist tampering and harsh environments.
Momentary switches excel in low-duty cycling, latching switches deliver clear state retention, and anti-vandal designs prolong service life in public or high-impact settings, emphasizing the importance of IP and NEMA ratings.
The Importance of IP and NEMA Ratings for Panel Mount Switches
IP (Ingress Protection) and NEMA (National Electrical Manufacturers Association) ratings define a switch’s resistance to dust, water, chemicals, and corrosion—crucial for industrial enclosures:
Understanding these ratings ensures you choose a switch that meets environmental challenges and complies with safety standards, setting the stage for proper panel preparation.
IP and NEMA Ratings for Switches
IP (Ingress Protection) and NEMA (National Electrical Manufacturers Association) ratings are essential for defining a switch’s resistance to environmental factors like dust, water, and corrosion. These ratings are critical for ensuring that switches meet safety standards and can withstand the challenges of industrial environments.
International Electrotechnical Commission (IEC), IEC 60529 (Various Years)
This citation supports the article’s explanation of IP and NEMA ratings and their importance in selecting appropriate switches for different industrial applications.
Preparing Your Access Panel for Switch Installation
Transforming a generic enclosure into a precision mounting surface supports both mechanical stability and environmental sealing.
Get a quote for custom panel-mount switches from Langir
Essential Tools and Materials for Access Panel Switch Installation
- Drill with matching hole saw or step bit
- Deburring tool or hand file
- Marker or punch for dimension marking
- Wire strippers, crimpers, torque wrench
- Insulated ferrules, heat-shrink tubing, thread-locking compound
- Safety gear: gloves and eye protection
These items ensure accurate cutouts, clean edges, and reliable electrical connections, leading into measuring and marking techniques.
Measuring and Marking Accurate Cutout Dimensions
Accurate cutout dimensions ensure a precise fit for the switch barrel, reducing installation errors and preserving environmental sealing. Follow these steps:
- Reference the switch datasheet for barrel diameter and panel thickness.
- Use a center-punch or marker to outline the hole location.
- Double-check alignment with other panel features or existing hardware.
- Drill a pilot hole, then enlarge with the hole saw or step bit.
Precision marking and drilling reduce the risk of misalignment, which is why deburring and cleaning the cutout are crucial next steps.
The Importance of Deburring and Cleaning the Cutout Before Mounting
Removing burrs and contaminants from the cutout prevents gasket damage and ensures a uniform seal around the switch barrel. Burrs can tear silicone gaskets and compromise IP ratings, while metal shavings cause short circuits. Use a deburring tool to smooth all edges, then wipe the area with a clean cloth before mounting, which sets up a reliable sealing surface for the gasket and barrel insertion process.
Step-by-Step Guide to Mounting a Switch in an Access Panel
Mounting a switch in an access panel requires precise gasket alignment, correct torque, and sealing techniques to guarantee durability and functionality in industrial conditions.
Positioning the Gasket and Inserting the Switch Barrel
- Place the gasket over the cutout, aligning its inner hole with the panel aperture.
- Insert the switch barrel through the gasket and panel until the actuator sits flush against the panel face.
Ensuring a flat, even gasket surface maintains IP compliance and prepares the switch for secure fastening.
Securing the Switch with Mounting Nut and Washer
- Slide the washer onto the barrel’s threaded end behind the panel.
- Hand-thread the mounting nut until finger-tight.
- Use a torque wrench set to the manufacturer’s specification (typically 3–5 Nm) to tighten the nut.
Proper torque avoids panel deformation and ensures the gasket remains compressed for an effective seal, which leads into vibration-resistance strategies.
Ensuring Vibration Resistance and Environmental Sealing
- Apply a drop of thread-locking compound on the barrel threads before nut installation.
- Check that the gasket compresses evenly around the barrel circumference.
- Consider adding a thin layer of silicone grease on the gasket for improved moisture resistance.
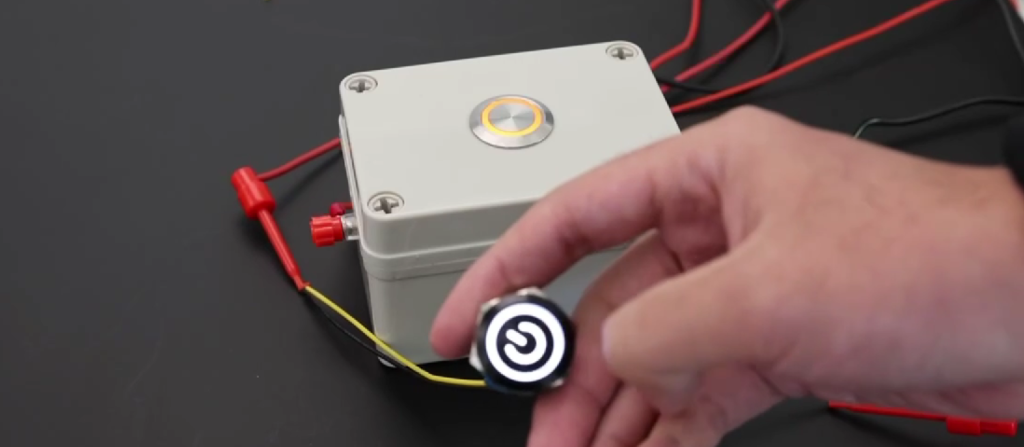
Wiring a Panel Mount Switch in an Access Panel
Wiring a panel mount switch involves correct terminal identification and precise wire preparation to guarantee consistent circuit performance and safety.
Identifying Switch Terminals: NO, NC, and Common
- NO Terminal: Circuit closes only when actuated.
- NC Terminal: Circuit opens when actuated.
- Common (C): Shared connection point for NO or NC.
Proper identification prevents miswiring and ensures the switch performs the intended function in the control system.
Best Practices for Wire Preparation and Connection
- Strip insulation to the exact terminal depth using calibrated strippers.
- Crimp insulated ferrules onto stranded wire ends for secure terminal grip.
- Slide heat-shrink tubing over the wire before crimping if extra insulation is needed.
- Tighten terminal screws to the specified torque (typically 0.4–0.6 Nm) to avoid conductor damage.
Meticulous wire preparation enhances conductivity, reduces contact resistance, and supports reliable switch operation.
Common Wiring Diagrams for Industrial Switches
These wiring patterns cover the majority of industrial control panel needs and illustrate how to connect power, load, and indicator circuits cleanly before moving on to safety checks.
Safety Precautions for Installing Switches in Access Panels
Implementing safety protocols protects personnel and equipment during installation and testing phases.
Lockout/Tagout Procedures for Electrical Work
- De-energize the panel circuit at the main breaker.
- Apply a lockout device and clearly visible tag on the breaker handle.
- Verify absence of voltage using a calibrated voltmeter at the switch terminals.
Following these steps prevents accidental startup and electrical shock, which is essential prior to circuit verification.
Testing the Circuit After Installation
- Remove lockout devices and re-energize the panel.
- Use a multimeter to verify continuity between C and NO or NC when actuated.
- Activate the switch manually, observing indicator lights or downstream equipment response.
Successful testing demonstrates functional wiring, paving the way for long-term reliability.
Troubleshooting Common Issues in Access Panel Switch Installation
Even precise installations may encounter loose connections, intermittent behavior, or seal breaches. Systematic troubleshooting restores performance quickly.
Get a quote for custom panel-mount switches from Langir
Fixing Loose Connections
- Inspect terminal screws for proper torque and re-tighten to specification.
- Replace any damaged ferrules or conductors that no longer clamp securely.
Ensuring consistent torque and ferrule integrity prevents voltage drops and contact arcing, pointing toward intermittent operation fixes.
Resolving Intermittent Switch Operation
- Disassemble the switch and clean contact surfaces with isopropyl alcohol.
- Check actuator alignment and gasket seating to confirm full contact engagement.
Clean, well-aligned components restore consistent switching action and guide you to sealing considerations.
Preventing Environmental Sealing Failures
- Use replacement gaskets rated for your IP/NEMA environment.
- Reapply silicone grease annually in washdown or dusty settings.
Maintaining gasket condition and uniform compression ensures ongoing protection against contaminants.
Langir’s Customization and Bulk Supply for Industrial Switch Mounting
Langir manufactures and supplies industrial push button switches in bulk and offers OEM/ODM services, enabling companies to procure tailored switch solutions for access panel integration with volume pricing and rapid lead times.
OEM/ODM Custom Switch Services by Langir
- Custom actuator shapes, colors, and legends for operator interfaces.
- Specified contact configurations (SPST, DPST, DPDT) to match circuit requirements.
- IP67 and NEMA 4X-rated sealing options for harsh environments.
- Unique bezel finishes and panel cutout templates to fit specialized enclosures.
These services deliver bespoke switch assemblies that integrate seamlessly into your equipment design, leading to cost savings and improved functionality.
Benefits of Bulk Purchasing Langir Push Button Switches
- Lower cost-per-unit pricing and predictable budgeting.
- Consistent quality control under ISO 9001 manufacturing standards.
- Reliable delivery schedules that align with production planning.
- Extended warranty and dedicated technical support.
Volume orders streamline procurement processes and reduce downtime risks, guiding you to real-world application examples.
Real-World Applications of Langir Switches in Industrial Access Panels
- Conveyor belt control panels requiring high cycling durability and IP65 protection.
- Packaging machinery interfaces with custom legend actuators for operator clarity.
- Safety interlock stations in metal fabrication lines using anti-vandal, IP67-rated models.
These case studies underscore Langir’s ability to deliver reliable switch solutions across varied manufacturing contexts.
Four key steps—from selecting the correct switch type and preparing the panel, through mounting, wiring, and safety checks—ensure a robust installation in any industrial setting. Partnering with Langir for OEM/ODM customization and wholesale supply streamlines your switch procurement and integration process. For tailored solutions or volume pricing, please inquire about bulk push button switches today.

